
By Greg Seaman
Composting is nature's way of recycling, and it's one of the most rewarding practices you can adopt for your garden and the environment. This comprehensive guide will show you how to transform kitchen scraps and yard waste into nutrient-rich "garden gold" while diverting up to 30% of household waste from landfills.
Key takeaways
- Maintain a ratio of one-third green (nitrogen-rich) materials to two-thirds brown (carbon-rich) materials for fastest decomposition.
- From simple open piles to enclosed bins, tumblers or worm composters, there's a composting solution for every situation.
- Keep your compost pile as moist as a wrung-out sponge and turn it regularly (or use a no-turn method with coarse materials).
- Skip diseased plants and pet manures to prevent pests and contamination.
- Finished compost can be ready in as little as 4-6 months, depending on your method and maintenance.
- Save autumn leaves to add carbon-rich material to your pile throughout the year, or try indoor composting with a worm bin.
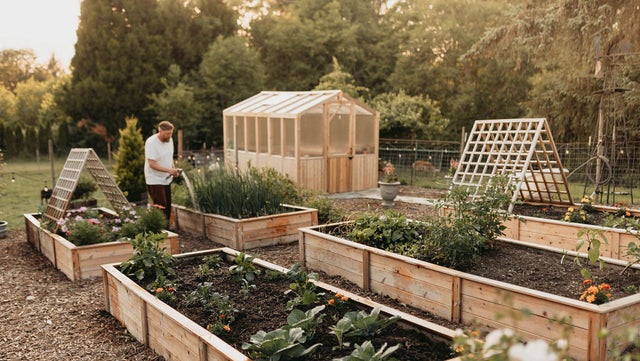
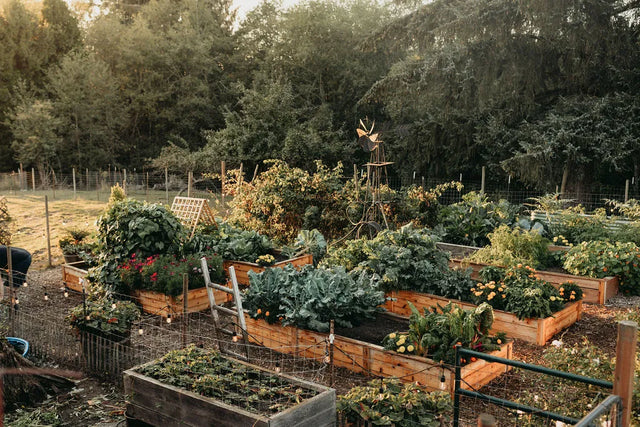
If you want to grow stronger plants, build healthier soil, and divert hundreds of pounds of waste from the landfill each year, composting is the single best habit you can pick up. This guide walks you through how to compost at home from start to finish: what you can throw in, what to leave out, how to choose the right bin or tumbler for your space, and how to know when your compost is ready to feed the garden. Whether you have a quarter-acre backyard or just a balcony, there’s a method that will work for you — and you’ll find the right bin in our compost bins collection.
Compost is a simple way to infuse your garden with nutrients that fuel plant growth and restore vitality to depleted soil. It’s also free, easy to make and good for the environment. The practice also has other benefits.
Callout:
Compost is the single most important supplement you can give your lawn or garden.
Why compost?
Composting has many benefits. These include:
- Excellent soil conditioner: By making compost, you are creating rich humus for your lawn and garden. This adds nutrients to your plants and helps retain soil moisture.
- Recycles kitchen and yard waste: A typical home composter diverts 400–600 pounds of organic waste away from the landfill each year. That’s important, because when organic matter hits the landfill, it lacks the air it needs to decompose quickly. Instead, it creates harmful methane gas as it breaks down, increasing the rate of climate change.
- Introduces beneficial organisms to the soil: Microscopic organisms in compost help aerate the soil, break down organic materials for plant use, and ward off plant disease.
- Good for the environment: Composting offers a natural alternative to chemical fertilizers when applied to lawns and garden beds.
Related: The Easiest Way to Start Composting Now
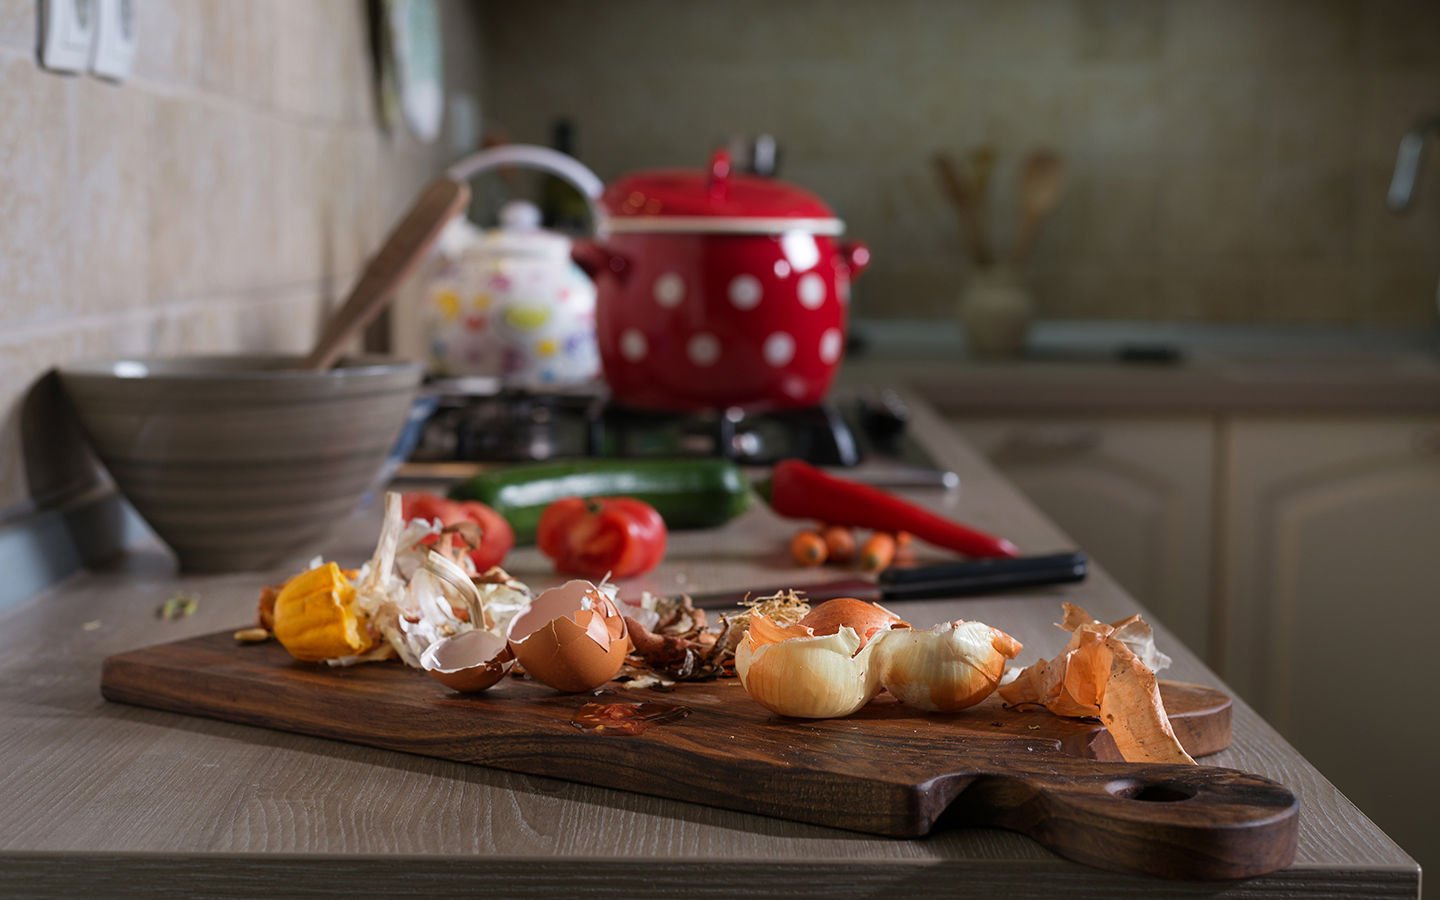
What can you put in a compost?
All compostable materials are either carbon or nitrogen-based to varying degrees. The secret to a healthy compost pile is to maintain a working balance between these two elements.
Carbon
Carbon-rich matter (like branches, stems, dried leaves, peels, bits of wood, sawdust or shredded paper) gives compost its light, fluffy body.
Nitrogen
Nitrogen- or protein-rich matter (manures, food scraps, green lawn clippings, kitchen waste, and green leaves) provides raw materials for making enzymes.
A healthy compost pile should have much more carbon than nitrogen, but since most materials are not pure carbon or nitrogen, a simple rule of thumb is to use one-third green materials and two-thirds brown.
The bulkiness of brown materials allows oxygen to penetrate and nourish the organisms that reside there. Too much nitrogen makes for a dense, smelly, slowly decomposing anaerobic mass. Good hygiene means covering fresh nitrogen-rich material with carbon-rich material, which often exudes a fresh, wonderful smell. If in doubt, add more carbon!
The table below details how the items in your compost are likely to be classified.
| Material | Carbon/Nitrogen | Information |
|---|---|---|
| Wood chips / pellets | Carbon | High carbon levels; use sparingly |
| Wood ash | Carbon | Only use ash from clean materials; sprinkle lightly |
| Tea leaves | Nitrogen | Loose or in bags |
| Table Scraps | Nitrogen | Add with dry carbon items |
| Straw or hay | Carbon | Straw is best; hay (with seeds) is less ideal |
| Shrub prunings | Carbon | Woody prunings are slow to break down |
| Shredded paper | Carbon | Avoid using glossy paper and colored inks |
| Seaweed and kelp | Nitrogen | Apply in thin layers; good source for trace minerals |
| Sawdust pellets | Carbon | High carbon levels; add in layers to avoid clumping |
| Pine needles | Carbon | Acidic; use in moderate amounts |
| Newspaper | Carbon | Avoid using glossy paper and colored inks |
| Leaves | Carbon | Leaves break down faster when shredded |
| Lawn & garden weeds | Nitrogen | Only use weeds which have not gone to seed |
| Green comfrey leaves | Nitrogen | Excellent compost 'activator' |
| Grass clippings | Nitrogen | Add in thin layers so they don't mat into clumps |
| Garden plants | -- | Use disease-free plants only |
| Fruit and vegetable scraps | Nitrogen | Add with dry carbon items |
| Flowers, cuttings | Nitrogen | Chop up any long woody stems |
| Eggshells | Neutral | Best when crushed |
| Dryer lint | Carbon | Best if from natural fibers |
| Corn cobs, stalks | Carbon | Slow to decompose; best if chopped up |
| Coffee grounds | Carbon | Filters may also be included |
| Chicken manure | Nitrogen | Excellent compost 'activator' |
What can’t you put in the compost?

- Do not compost meat, bones, or fish scraps (they will attract pests) unless you are using a composter designed specifically for this purpose. The Green Cone Solar Waste Digester or the Jora compost tumbler are two examples of composters that will accommodate these materials.
- Avoid composting perennial weeds or diseased plants, since you might spread seeds or diseases.
- Don’t include pet manures in compost that will be used on food crops.
- Banana peels, peach peels and orange rinds may contain pesticide residues and should be kept out of the compost.
- Black walnut leaves should not be composted.
- Sawdust may be added to the compost, but should be mixed or scattered thinly to avoid clumping. Be sure sawdust is clean, with no machine oil or chain oil residues.
- Charcoal ash from briquettes — chemicals are harmful to plants.
- Glossy or coated paper — coatings don’t break down.
- Weeds gone to seed or invasive perennials (bindweed, quackgrass, Bermuda grass) — cold piles won’t kill seeds or root fragments.

Green Cone Solar Waste Digester
How to set up a home composting system
Setting up a home composting system takes about an hour — the rest is patience. It comes down to four decisions, each covered in detail below:
1. Pick a system that fits your space and how hands-on you want to be — see Choosing a compost system, or browse the compost bins collection. 2. Choose a spot that’s level, well-drained, partly shaded, and an easy walk from the kitchen. 3. Build your first pile — coarse browns on the bottom, then alternate greens and browns — step by step in How to build and maintain a compost pile. 4. Keep a simple rhythm — moisture like a wrung-out sponge, and a turn every week or two.
How can you compost yard waste?
With yard and garden wastes, different materials will decompose at different rates, but they will all break down eventually. If you want to speed up the process, chop the larger material into smaller pieces.
Leaves and grass clippings are also excellent for compost but should be sprinkled into the bin with other materials, or dug into the center of the pile and mixed. Avoid putting them on in thick layers – they will mat together and reduce aeration.
Callout:
Adding garden soil to your compost will help to mask any odors, and microorganisms in the soil will accelerate the process.
How to compost autumn leaves
If you have too many leaves to incorporate into the compost bin, you can simply compost the pile of leaves by itself:
- Locate the pile where drainage is adequate; a shaded area will help keep the pile from drying out.
- The leaf pile should be at least 4′ in diameter and 3′ in height.
- Include a layer of dirt between each foot of leaves.
- The pile should be damp enough that when a sample taken from the interior is squeezed by hand, a few drops of moisture will appear. The pile should not be packed too tightly.
- The pile will compost in 4 to 6 months, with the material being dark and crumbly. Leaf compost is best used as an organic soil amendment and conditioner; it is not normally used as a fertilizer because it is low in nutrients.
For more information, read Use Autumn Leaves to Keep Your Compost Working Through the Winter
How to make leaf mold tea
Use leaves to make a nutritious “tea” for your plants:
- Wrap a small pile of leaves in burlap and immerse in a large bucket of water.
- Leave for three days.
- Remove the “tea bag” and dump its contents into the compost.
- Scoop out the enriched water with a smaller bucket.
- Use it to water your plants and shrubs.
Related: 10 Pro Composting Tips From Expert Gardeners
Choosing a compost system
Choosing what type of composter will work best for you involves considering three main factors:
- Where you live
- What you’ll be composting
- Whether you want to turn your compost manually or not.
If you’re prepared to turn your compost every 1-2 weeks and you live in an area with access to outdoor space and carbon rich materials, enclosed bins or open compost piles could work for you.
If you live in an urban environment or your back isn’t ready for all that turning, compost tumblers or a worm composter are options worth considering.

Hungry Bin - Continuous Flow Worm Composter
| Where do you live? | What will you be composting the most? | ||
|---|---|---|---|
| Composting mostly kitchen scraps | Composting kitchen scraps plus some yard waste | Composting lots of yard waste | |
| Urban (no outdoor space) |
Worm bin (vermicomposting) |
||
| Urban (some outdoor space, patio, or balcony) | Worm bins or Compost tumbler |
Compost tumbler | |
| Suburban (with yard) | Enclosed bin or compost tumbler | Enclosed bin or compost tumbler | Enclosed or DIY bin |
| Rural (with yard/acreage) | Enclosed bin, or compost tumbler | Open compost pile, enclosed bin, or tumbler | Open compost pile or multiple enclosed bins |
Related: How to Choose the Right Composter
Hot composter — insulated bins like the HOTBIN reach high internal temperatures and produce finished compost in as little as 6–8 weeks. Best for households that want fast results and don’t mind the upfront cost.
Simplest composting methods
“No-turn” composting
The biggest chore with composting is turning the pile from time to time. However, with ‘no-turn composting’, your compost can be aerated without turning.
The secret is to thoroughly mix in enough coarse material when building the pile. The compost will develop as fast as if it were turned regularly, and studies show that the nitrogen level may be even higher than with turned compost.
With ‘no-turn’ composting, add new materials to the top of the pile and harvest fresh compost from the bottom of the bin. This can be easily done in a HOTBIN composter.
Enclosed compost bins
For small-scale outdoor composting, enclosed bins are the most practical. Enclosed bins include:
- DIY compost bin: The least expensive method is to build one yourself from a heavy-duty garbage can. Drill 1.5-cm aeration holes in rows at roughly 15-cm intervals around the can. Fill with a mixture of high-carbon and high-nitrogen materials. Stir the contents occasionally to speed up the composting process. If the lid is secure, lay the can on its side and roll. A length of 2 x 2 cedar can be bolted to the inside, running top to bottom, to help flip the material. Without this, the contents tend to stay in place while the bin is rolled. Another option is to build your own bin from scrap lumber or spare wooden pallets.
- Standard compost bins: Another option is a compost bin, sometimes called a ‘compost digester’. Compost bins are enclosed on the sides and top, and open on the bottom so they sit directly on the ground. These are common composting units for homes in residential areas where bins tend to be smaller, yet enclosed enough to discourage pests.
- Tumblers: The most efficient enclosed bin method is the compost tumbler. It’s possible to maintain relatively high temperatures in drum/tumbler systems, because the container acts as insulation and the turning keeps the microbes aerated and active. Some designs help bring air into the compost and prevent clumping of the composting materials.
To learn more, see Compost tumblers: Comparing different compost tumbler models
Trench composting
Trench composting works well for active gardeners who can dig a foot-deep trench between rows and bury kitchen scraps directly. No turning, no layering, no bin to buy — and the buried scraps feed the soil in place.
How to build and maintain a compost pile
Steps for preparation:
- Start your compost pile on bare earth. This allows worms and other beneficial organisms to aerate the compost and be transported to your garden beds.
- Lay twigs or straw first, a few inches deep. This aids drainage and helps aerate the pile.
-
Add compost materials in layers, alternating moist and dry.
-Moist ingredients are food waste, tea bags, seaweed, etc.
-Dry materials are straw, leaves, sawdust pellets and wood ashes. If you have wood ashes, sprinkle in thin layers, or they will clump together and be slow to break down. - Add manure, green manure (clover, buckwheat, wheatgrass, grass clippings) or any nitrogen source. This activates the compost pile and speeds the process along.
- Keep compost moist. Water occasionally, or let rain do the job.
- Cover with anything you have – wood, plastic sheeting, carpet scraps. Covering helps retain moisture and heat, two essentials for compost. Covering also prevents the compost from being over-watered by rain. The compost should be moist, but not soaked and sodden.
- Every few weeks give the pile a quick turn with a pitchfork or shovel. Oxygen is required for the process to work, and turning “adds” oxygen. You can skip this step if you have a ready supply of coarse material like straw.
- Once you’ve established your compost pile, add new materials by mixing them in, rather than by adding them in layers. Mixing, or turning, the compost pile is key to aerating the composting materials and speeding the process to completion. If you want to buy a composter, rather than build your own compost pile, you may consider buying a rotating compost tumbler which makes it easy to mix the compost regularly.
VermiFlow Continuous Flow Composting System - 14 Cubic Feet


Special cases & tips
Apartment composting: A countertop electric composter or an indoor worm bin handles kitchen scraps in spaces with no yard. Even on a balcony or in an urban location you can still cut your organic waste and make compost for potted plants, planters, or a community-garden plot — several odor-free, compact methods work in small apartments (see How to Compost in an Apartment).
Kitchen-only outdoors: If your "yard" is a balcony or you only have kitchen scraps, a bokashi system ferments all your food waste — including meat and dairy — in a sealed bin with no turning and no smell, then finishes in any pile or buried in soil.
Cold-climate composting: Piles slow down in freezing weather but don’t die — they pick back up in spring. An insulated hot composter is the only reliable winter-active option.
Composting in summer: Heat and dryness can stall a pile. Check moisture twice a week in July/August.
Activate your compost: "Activators" kick-start decomposition and speed things up. Common ones include comfrey leaves, grass clippings, young weeds, and well-rotted chicken manure. You can buy an inoculant at a garden center, though a shovelful of finished compost from another pile works just as well.
When is compost ready – and how to use it
Compost is ready when it is dark brown or black. It should have an earthy, soil-like smell (not rotten or ammonia-like) and a crumbly texture that holds together slightly when squeezed. In addition, original materials should be unrecognizable (except for tougher items like woody stems or eggshells). The temperature should be ambient, not hot. This process typically takes 2-6 months depending on your method.
How to use finished compost
Finished compost is the end result of all your hard work. But how should you use it?
- As a soil amendment mixed into garden beds (2-4 inches worked into the top 6-8 inches of soil)
- As a top dressing or mulch around plants (1-2 inch layer)
- Mixed into potting soil for containers (about 1/4 to 1/3 of the mix)
- As a lawn topdressing (thin layer, 1/4 inch)
- For making compost tea
Finished compost pairs well with biochar — many home gardeners blend them to extend nutrient retention and microbial activity. See our guide to supercharging your soil with biochar.
Common problems, mistakes & troubleshooting
My compost pile smells bad (sour or rotten-eggs)
Usually too wet, too much green, or not enough oxygen. Mix in dry browns (shredded cardboard, dry leaves, straw) and turn the pile to aerate it. Covering each new kitchen addition with dry grass clippings or similar mulch helps, and a little lime or calcium will neutralize odors. If it smells like ammonia, add carbon-rich material — straw, peat moss or dried leaves. The pile should smell earthy, not sour. See 7 Signs Your Compost is Struggling and What You Can Do About It.
My compost pile won’t heat up
Usually too small (less than 3×3×3 ft), too dry, or too brown-heavy. Add greens (kitchen scraps, grass clippings) and water until the material feels like a wrung-out sponge, and rebuild the pile larger if you can.
My compost attracts rodents or flies
Meat, dairy, or oily scraps have probably been added. Bury them deep in the center of an active pile, switch to a sealed tumbler, or move food waste to a buried digester. Cover fresh kitchen additions with a few inches of browns each time. Fruit flies are drawn to exposed fruit and vegetable matter, so keep a small pile of grass clippings next to the bin and cap each new addition with an inch or two; a little lime or calcium discourages them too.
My compost is slimy or compacted
Too wet and too dense. Turn it, add coarse browns (twigs, straw, shredded cardboard), and avoid thick layers of grass clippings — those mat down and exclude air. Wet, sticky materials that clump and slow aeration can be set to the side of the composter and added gradually, or broken apart with a pitchfork; mix grass clippings and leaves through the rest of the pile rather than dumping them in a layer. A soggy pile — common in winter, when browns are scarce — just needs its carbon-nitrogen balance restored (see How to Fix a Soggy Compost Pile).
My compost is dry and dusty
Add water, mix in fresh greens, and cover the pile (a tarp or lid) to retain moisture between additions.
Raccoons in my compost

If raccoons are a regular problem in your area, they will treat an open pile as a buffet. A wooden or metal lid hinged onto an open bin solves it cheaply; a sealed tumbler or a commercial pest-proof composter — such as the Jora JK270 — solves it permanently.

HOTBIN 200 Composter - 6.9 Cubic Feet (52 Gallon) Compost Bin
Stockpiling autumn leaves
The hardest part of small-scale backyard composting is finding enough carbon-rich material to balance the steady stream of nitrogen-rich kitchen scraps. Autumn leaves are the perfect fix — rake them up and stash a few bags next to the bin so you have browns to add all year round. See Use Autumn Leaves to Keep Your Compost Working Through Winter.
Composting weed seeds and invasive perennials
A well-maintained hot pile that reaches about 140°F will kill most weed seeds (it takes roughly 30 days at that temperature). Cold piles won’t — so keep seedheads, bindweed, quackgrass, Bermuda grass and rhizome-spreading perennials out of a cold pile, or you’ll spread them when you apply the finished compost. Turn the pile so cooler outside material reaches the hot center, and watch out for seeds hitching in on bedding, hay or mulch (straw is mostly weed-free; hay is not). See Can You Compost Weeds for the Garden?
Not sure which bin or tumbler fits your space and routine? Our dedicated guide on how to choose the right composter walks through every system side by side. When you’re ready to buy, browse the compost bins collection — durable, low-maintenance systems built for North American climates.
Composting FAQ
1. How long does it take for compost to be ready to use?
Compost typically takes 2-6 months to be ready, depending on your method and conditions. Hot, actively turned compost can be ready in as little as 6-8 weeks, while no-turn or passive composting may take 6-12 months. Your compost is ready when it's dark brown, crumbly, smells earthy, and the original materials are no longer recognizable.
2. What's the ideal ratio of brown to green materials?
The ideal ratio is roughly one-third green (nitrogen-rich) materials to two-thirds brown (carbon-rich) materials. Green materials include food scraps, fresh grass clippings, and kitchen waste. Brown materials include dried leaves, straw, sawdust, and shredded paper. If your pile smells bad, add more browns. If it's not decomposing, add more greens.
3. Can I compost citrus peels and onions?
Yes, you can compost citrus peels and onions, though some sources suggest using them sparingly. Banana peels, peach peels and orange rinds may contain pesticide residues and many gardeners prefer to keep these out. In general, citrus can slow decomposition slightly and may deter worms in vermicomposting, but in regular compost bins they'll break down fine when mixed with other materials.
4. Do I need to turn my compost pile?
Not necessarily. While turning speeds up decomposition by adding oxygen and distributing heat, you can use a "no-turn" method by mixing in enough coarse materials (like straw or wood chips) when building your pile. These materials create air pockets that allow for passive aeration. Compost tumblers make turning easy, but static bins can work well too if properly constructed.
5. Why does my compost smell bad?
Bad odors usually indicate too much nitrogen (greens) or too much moisture. If your compost smells like ammonia, add carbon-rich materials like dried leaves, straw or shredded paper. If it smells rotten or sour, it's too wet—add dry brown materials and turn the pile to increase airflow. A healthy compost pile should smell earthy and pleasant.
6. Can I compost meat, dairy, and cooked foods?
Generally, it's best to avoid meat, bones, fish and dairy in traditional compost bins as they attract pests and can create odors. However, specialized composters like the Jora tumbler or Green Cone Solar Waste Digester are designed to handle these materials.
7. How do I know if my compost is too wet or too dry?
Your compost should feel like a wrung-out sponge—moist but not dripping. To test, squeeze a handful: if water drips out, it's too wet (add dry browns and turn it). If it feels dry and dusty, add water or green materials. Proper moisture is essential for microbial activity. Cover your pile to prevent it from getting waterlogged by rain.
8. Can I add weeds to my compost?
Yes, but it’s easiest to only compost weeds that haven't gone to seed. Weed seeds can survive in compost that doesn't reach high enough temperatures (about 140°F), and you'll end up spreading them in your garden. Also avoid perennial or invasive weeds. For best results, maintain hot compost temperatures and turn your pile regularly. For more information, read our guide: Can You Compost Weeds in the Garden?
9. What is the easiest way to compost?
For an indoor, hands-off option, a continuous-flow worm bin like the Urban Worm Bag does the work for you. For kitchen scraps with no yard, a sealed bokashi system handles everything — including meat and dairy. For an outdoor yard, an insulated hot composter like the HOTBIN is the easiest set-and-forget choice.
Further resources & references
Here are some further resources to familiarize yourself with composting:
From Eartheasy
How to Build a Compost Bin
Step-by-step instructions for constructing your own compost bin using simple materials and basic tools.
Start Composting in a Tumbler: Your Quick & Easy Guide
A beginner-friendly guide to tumbler composting that makes creating finished compost faster and more convenient.
Compost Tumblers: Comparing Different Models
An in-depth comparison of popular tumbler designs to help you choose the best option for your needs and budget.
Worm Composting Basics for Beginners
Everything you need to know to start vermicomposting and turn kitchen scraps into rich fertilizer with worms.

Worm Factory 360 Composter - 4 Tray Vermicomposter
Get Started With School Composting
A comprehensive guide for educators to implement composting programs that teach students about sustainability.
University Extension Resources
University of Minnesota Extension: Composting in Home Gardens
Comprehensive guide covering compost bin construction and materials
Cornell Cooperative Extension: Compost Resources
Extensive collection of PDFs including troubleshooting guides, testing for finished compost, and winter composting
University of Maryland Extension: How to Make Compost at Home
Detailed information on carbon-to-nitrogen ratios and hot vs. cold composting
Penn State Extension: Home Composting Guide
Covers compost benefits, materials, and application rates
Oregon State University Extension: Composting Publications
Research-based guidance on soil testing and compost use
Colorado State University Extension: Composting
Information on composting manure and agricultural wastes
Composting made easy
Composting is a simple way to transform kitchen scraps and yard waste into nutrient-rich soil that benefits your garden and the planet. By understanding what materials to include and avoid, maintaining the right balance of “greens” and “browns,” and choosing the composting method that fits your space, anyone can reduce waste, improve soil health, and support sustainable living.
Looking for the right composter? Visit our store to view our full line of products!