
By Greg Seaman
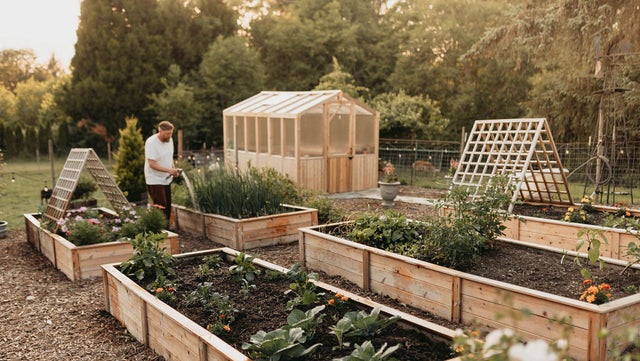
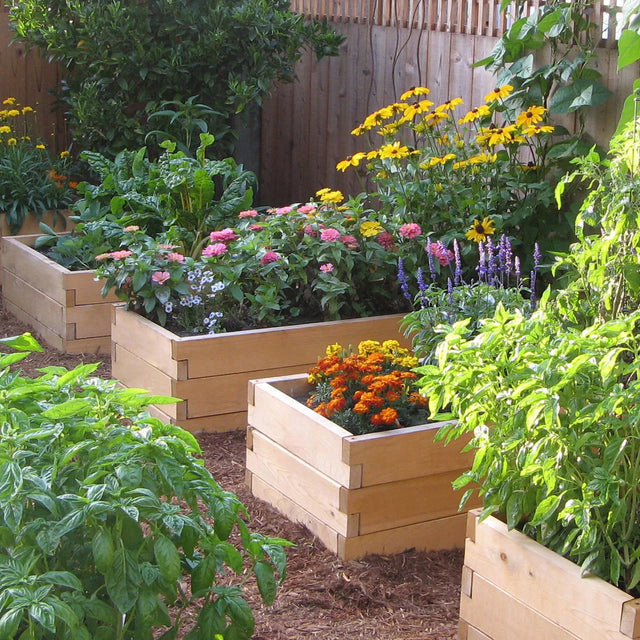
Raised garden beds are great for growing small plots of vegetables and flowers. They keep pathway weeds from your garden soil, prevent soil compaction, provide good drainage and serve as a barrier to many pests.
Key takeaways
- Raised beds improve drainage and prevent soil compaction, helping plants grow stronger and healthier throughout the season.
- The elevated design reduces bending and back strain, making planting, weeding and harvesting easier and more comfortable.
- Raised beds let you choose soil mixes and placement, making it simple to garden on patios, poor soil or uneven ground.
Raised garden beds (also called garden boxes) have many benefits. These include:
- Cleaner, healthier soil conditions
Raised beds keep pathway weeds from entering your garden soil and prevent soil compaction from foot traffic. The contained sides also keep valuable soil from washing away during heavy rains, which helps maintain soil structure and fertility over time. - Improved drainage and earlier planting
Because the soil is elevated above ground level, it drains more effectively and warms earlier in the season. In many regions this allows gardeners to plant sooner and extend the growing window. These conditions are also ideal for square foot gardening. - Better protection from pests
The structure of raised beds acts as a barrier to pests such as slugs and rabbits, helping to reduce plant damage without relying on chemical controls. - Greater comfort and accessibility
Raising the soil level reduces back strain when bending over to tend the bed. If the beds are built well, the gardener can sit on the edge while weeding, planting, or harvesting—an additional ergonomic benefit. - Flexibility of construction and materials
Raised garden beds are available in a variety of different materials, or they can be made with relative ease to suit different garden layouts, styles and budgets.
Deer Proof Cedar Complete Raised Garden Bed Kit - 8' x 8' x 20"


What’s the difference between raised garden beds and planters?
Raised garden beds are not the same as garden planters. Planters are elevated containers which have bottoms to prevent the soil from falling out. Planter bottoms usually are slatted, with some type of semi-permeable cloth barrier permitting drainage. Raised beds don’t have bottoms; they are open to the ground, which gives plant roots access to the soil below for added nutrients.
How to build a raised garden bed: getting started
Building elevated beds for your vegetable garden is simpler than it looks. First, you’ll need to make some key decisions to simplify the construction process and provide a secure, customized design:
- What kind of material to use
- How tall you want the bed to be
- Whether you want to use pre-made corner braces
While you can also use concrete blocks or other materials for your beds, wood is usually the most cost effective and readily available.
What kind of wood to use?
In most cases, cedar is the best wood to use for garden beds because of its natural rot resistance. Western red cedar is commonly used, but white cedar, yellow cedar and juniper are also high-quality choices for outdoor construction projects.
Redwood is another excellent rot-resistant wood, but redwood is a more limited resource. How long the wood will last depends on the type of cedar and your local weather conditions. In our garden, we use red cedar for building the beds, and some of these beds have lasted 15 years.
How tall should the bed be?
You can build a raised bed to any height up to 36 inches, though the most common height is 11 inches, which equals two stacked 2 x 6 boards.
If you have good soil beneath your bed, roots will grow deeper to reach additional nutrients, so beds can be as low as 6 inches. Taller beds require attention to side pressure, since added soil can bow the boards outward. Prevent this with cross-supports, which we recommend for beds taller than 18 inches or longer than 6 feet.
Soil depth requirements for the vegetables you plan to grow are also important. Depending on conditions under the bed, you may want higher sides for certain crops. For more detail, read our guide: Raised Beds: Soil Depth Requirements
How wide and long should the bed be?
We recommend bed width to be no wider than 4 feet across. This is because it’s easy to reach the center of a four-foot bed from either side. It’s also important to keep the width this narrow to avoid having to step on the bed, since this would compress the soil.
The bed can be any length as long as cross supports are installed every 4 to 6 feet along the length of the bed to prevent bowing. If you have the space, we think longer beds are best.
We have built many beds over the years, and our construction process has evolved. The method described below is, in our opinion, the simplest method of building a raised garden bed to any length, width and height.
Building a raised garden bed: tools & materials
Lumber
Use cedar 2 x boards for the sides. These are commonly 2 x 6, but you can use 2 x 4 or 2 x 8 boards if this is what you have available. (Two-inch boards bought at a lumber yard are actually 1.5 inches thick.) For the corner posts, use 4 x 4s, cut to 10 inches longer than the desired height of the bed. If your bed is going to be longer than 8 feet, you’ll need extra posts to put in mid-span to prevent bowing and to provide a place to secure the cross-supports.
In the photos below, we used 2 x 4 boards for the posts instead of 4 x 4’s. This is because the wood we had was full dimension, (i.e., the 2 inch thickness was a full 2 inches). If you get your wood from a mill, they can cut it full dimension for you.
Fastenings
Use 3.5 inch #10 coated deck screws for the project. You’ll need six screws for each corner and two for each mid-span post. If you are using cross-supports, get a few 1 inch stainless screws.
Cross supports
Buy several lengths of ½ inch aluminum flat stock. This is available at most hardware stores, usually in 8 foot lengths. It is very easy to cut with a hacksaw and to drill for the screws.
Tools
Use a hand saw, square, carpenter’s level, mallet (or sledge), screwdriver, hacksaw and drill.
Is treated lumber safe in raised beds?
No. In 2003, the EPA banned the sale of lumber treated with chromated copper arsenate (CCA) for residential use. Two compounds, alkaline copper quat (ACQ) and copper azole (CA-B), have now replaced CCA wood in the residential market. Both contain copper and a fungicide but no arsenic. The copper keeps insects at bay, and the fungicide prevents soil fungus from attacking the wood.
In ACQ, the fungicide is quat, which is also used in swimming-pool chemicals and as a disinfectant. The other compound, CA-B, uses copper and tebuconazole, a fungicide used on food crops. According to Miles McEvoy, who works in organic certification with the Washington State Department of Agriculture, no pressure-treated wood is allowed in soils used to grow organic food. If you want to meet this high standard, choose a different material.
Until the safety of treated wood is proven conclusively, we recommend you use a naturally rot-resistant wood like red cedar, black locust or redwood. Under most circumstances, these woods will last 10 to 20 years. Recycled composite plastic lumber is another alternative, and is now available in a variety of sizes and colors.
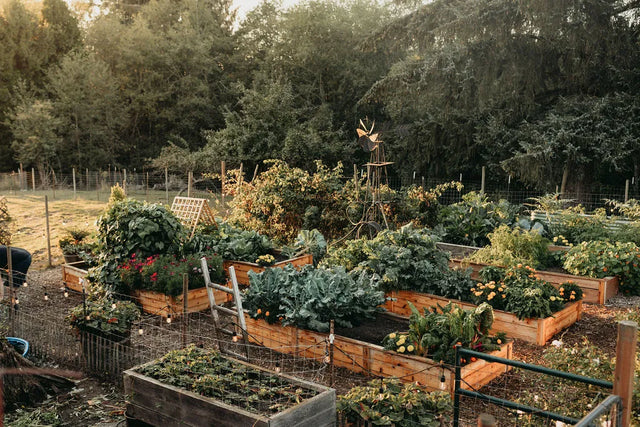
How to layout and install raised garden beds
- Lay out the beds so the long side faces south: This assures equal light exposure to all the plants growing in the bed. If your bed is aligned with ends facing south, you may have taller plants in front blocking sunlight to small plants in back.
- Leave a generous width between beds for the pathways: Pathways between beds should be wide enough for a small wheelbarrow. For grass pathways, make sure they are at least wide enough for a weedeater or a small mower. (In our raised bed gardens, the pathways are 22″ wide.)
- Double-dig the bed area: If the ground has never been used for gardening, loosen the soil to a depth of 16 inches. This gives you a chance to remove rocks and see the composition of your soil. Leave soil piled up in the center, away from the sides, so you can set the bed in place without obstructions.
- Check for roots: As you dig the soil, keep an eye out for tree roots growing beneath your beds. If left to grow, these can steal organic amendments you add to the soil. Pull any back towards their source and remove the main clump. If the source is a living tree, you may need to install a root barrier.
- Level the bed: Use a level for this task. This may seem overly meticulous, but after several waterings the soil will settle to level, and you’ll want the bed to be the same. Set a stiff board (2×4) on top of the bed sides, across the span, and set your level on this board. Tap down the sides as needed till you get a level reading. Be sure to check for level both along the length and across the width of your bed.
- Consider burrowing pests: If your garden has moles, add a layer of 1/2 or ¼ inch hardware cloth (galvanized mesh) across the bottom, before adding your soil. The mesh should continue at least 3 inches up the insides of the bed and be stapled in place. If you plan to grow root crops, such as potatoes or carrots, you may want to set the mesh lower in the ground by digging deeper when you are setting up the bed.
- Spread soil out evenly: Add planned soil amendments, such as peat, compost or lime, and spread the soil evenly across the bed. Water the bed with an even, fine spray. This will settle the soil; add more soil to “top off”. (Over time the soil will settle an inch or two more.) Rake the bed once more to even out the soil and you’re ready to plant.
To learn more about developing healthy soil, read our guides:
- 6 Tips for Building Soil in your Raised Beds and Planters
- 3 Useful Soil Mixes for Planters and Raised Beds
More installation tips
Avoid stepping on the bed
Once the soil is added and the bed is planted, make it a policy to never step on the bed. Stepping on the bed will compact the soil, reduce aeration and impact root growth. Instead, consider a ‘spanner board’, a short sturdy board, just longer than the width of your beds. This board can be laid across the bed to set buckets on when weeding or adding amendments.
Mulch the pathways between beds
Weeding pathways is a nuisance that you can avoid by putting a double layer of perforated landscape cloth over the pathway and covering this with a 2- 3″ layer of bark mulch or coarse sawdust. When laying down the landscape cloth, allow it to come up 1″ against the bottom board of the bed, and staple this to the bed. This will remain hidden under mulch.
Watch for weed seeds in mulch
When buying mulch, ask the seller if they have had complaints about weed seeds in the mulch. It’s very common for bark mulch to have seeds that sprout in your pathways. Some weeds will still appear on your pathways regardless of the mulch, but you can minimize this by finding a clean source.

Organic Natural Wool Garden Mulch – 3' x 6' Weed Barrier Mat
Can a raised bed be installed on a concrete surface or patio?
Yes, many beautiful raised bed installations are set on concrete surfaces. But there are a few things to keep in mind. Typically, patio and driveway surfaces are not level, so water can drain away from the house structure. Raised beds, however, should be built to level, the same as if being constructed on soil. This means the bottoms of the beds will need to be blocked up on the low end just enough to facilitate and direct drainage. To learn more about this, read our article:
Gardening on Concrete with Raised Beds and Patio Containers

What’s the best soil for raised garden beds?
While you can fill your beds with your own topsoil, you’ll give your plants a better chance by starting fresh and preventing weeds. Here are some options for raised bed soil:
Best homemade soil blend
50% screened topsoil made of healthy loam.
50% screened compost (homemade compost, fish compost, mushroom or animal manure)
Best premium soil blend
1/3 peat moss
1/3 vermiculite
1/3 compost
This last combination will help eliminate weeds. The real key to both, however, is the compost. No matter how great your topsoil, your beds will struggle without compost, which needs to be added yearly. For more information, read our article, How to Build and Nourish Healthy Garden Soil.
Building soil in raised beds
We find these three methods to be the simplest ways to nourish your soil with organic matter:
- The lasagna method: Fill the bottom of your garden boxes with a layer of leaves, grass clippings, straw, wood chips and other organic materials. Add a layer of cardboard on top. Next, add your soil. This mixture will break down into rich compost over time.
- Green manures: Every couple of crops, plant a legume such as clover or field peas in your raised bed. When this matures, chop it up and or cut back to the surface of the soil. Leave to rot for the following season.
- Compost: Add any combination of organic composts to create a light, crumbly, fluffy texture.

How to irrigate raised garden beds
There are many ways to water a raised bed. Each one has a variety of pros and cons.
- Drip Irrigation: A network of hoses with emitters or holes that allow water to drip out slowly.
- Soaker Hose: A porous hose that leaks or soaks water out along its entire length.
- Sprinkler: A device with holes hooked to the end of a hose that sprays water through the air.
- Hand Watering: Watering with a sprayer or other nozzle by hand.
- Wicking: Filling a porous reservoir under the soil that wicks water slowly into the soil, with a specially built garden bed or primitive olla pot.

Oya Clay Watering Vessel
| Irrigation Method | Price | Labor | Installation | Effectiveness |
|---|---|---|---|---|
| Drip | Relatively expensive | No work during watering | More work to install | Very precise, saves water, prevents disease |
| Soaker Hose | Relatively inexpensive | No work during watering | Less work to install than drip | Gaps possible, saves water, prevents disease |
| Sprinkler | Inexpensive | Some light work to move sprinklers | No work | Covers everything, including areas that may not need water |
| Hand | Very inexpensive | Time intensive | No work | Targets desired areas |
| Wicking | Somewhat expensive | No work | Lots of work to set up | Very precise |
How to install irrigation on raised garden beds
The goal of any irrigation system is to make sure every plant gets enough water to thrive. With each method of irrigation there is a different strategy to meet this goal. Here are the basic steps to ensure success.
- Measure and plan your bed: Note the length and width of each bed. Decide where tubing, drip lines or soaker hoses will go so every plant receives water.
- Install tubing or hoses: Place drip tape, soaker hoses or sprinklers along your plant rows. Use landscape staples or clips to keep tubing secure and immobile at the sides of the bed.
- Connect to water: Attach tubing to your faucet or main supply, using fittings as needed. Add an automatic timer to simplify watering and ensure consistent soil moisture.
- Test and tweak: Turn on the system, check coverage and move emitters or hoses if any areas are dry.
How often should I water?
If the soil is dry one inch below the surface, it’s time to water. Raised beds need to be watered a little more often than traditional, in-ground beds because they drain faster and tend to encourage rapid plant growth, which requires more water.
In the summer, this might mean watering multiple times per day depending on the stage of plant growth and the type of crop. In general, it’s better to water deeply a few times per week than more frequent, shallow watering.
Should I automate my watering system?
Automation works best with a drip line or soaker hose system. Putting your hoses on a timer ensures that you won’t forget to water when your plants most need it, and saves your crop when you are on vacation.
Automating your system also allows you to water during the evening or the middle of the night when evaporation is lowest. For more information about automating your watering system, see our article about The Absentee Gardener: How to water Your Vegetable Garden Without Being Home.
How can I conserve irrigation water?
If you are using drip tape or soaker hoses, you’ve already taken a big step towards conserving water. You can take this a little further by mulching on top of the hoses around your plants to further reduce evaporation.
Routine maintenance of your system should also include checking for leaks, which are often caused by creatures looking for water (or errant pitchforks). It’s also a good idea to install shut-off valves for each bed or garden section so that you can choose to water some beds less when your growing season is winding up or down.
Are there any special considerations when watering raised beds?
Yes! The edges of the bed will dry out a little faster than the middle, so pay special attention to the location of your plants. If you are sprinkling or spraying, put a mug in your garden to see how many inches of water you are using. You can also place a container beneath one of the holes in your drip line to gauge how much water your system is delivering to each plant. See Drip Irrigation vs. Soaker Hoses: Which is Better for Your Garden?

Composters: Different Styles
The best ingredient to put in your garden is your own compost. The best composters are sealed units (tumblers) that convert kitchen, yard and garden waste into compost in just a few weeks. These compost tumblers are ideal for urban gardens and homes with small yards.
SHOP NOW
Cedar Elevated Planters
Use an elevated cedar planter to grow vegetables or flowers on patios, balconies and restricted spaces. These rot-resistant, portable planters can be moved indoors in winter.
SHOP NOW
Non-toxic Weed Control Products
Stop weeds before they sprout with corn gluten or kill mature weeds with our non-toxic Burnout spray. Remove weeds easily with the Cobrahead precision weeder and cultivator.
SHOP NOW
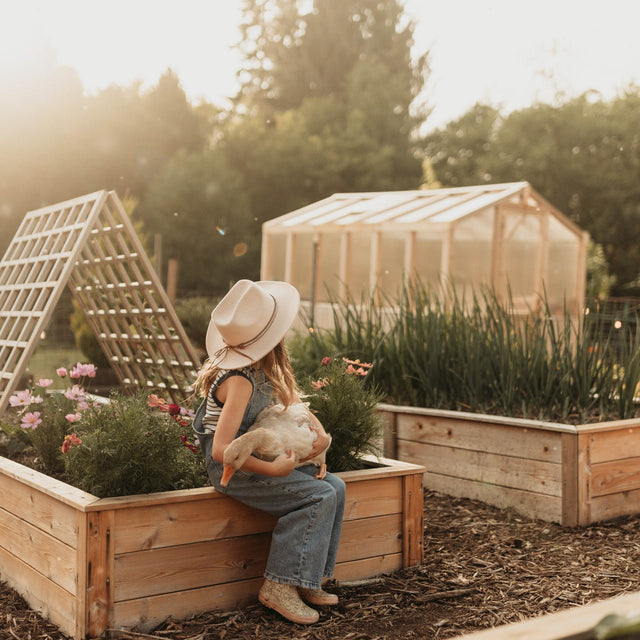
Greenhouses and Garden Cold Frames
Start seedlings earlier in the spring in a controlled environment and extend crops later in fall. Our clear and translucent greenhouses protect your plants from unseasonal weather. Choose from over 20 models!
SHOP NOW
Watering
Our recycled rubber hoses are made in the U.S.A. and are guaranteed for life. Additionally, our high quality soaker hoses, rain barrels, sprayers, and other products will help you conserve water.
SHOP NOW
Build a portable garden cloche
Protect seedlings from the elements, extend the growing season, keep moisture in and pests out. You can build this cloche yourself.
SHOP NOW
Complete Raised Garden Bed Kits
Simplify raised bed construction by purchasing a complete, rodent-proof kit available in redwood and cedar, and in different sizes and configurations. For even more ease, choose a kit complete with fenced trellis and built-in irrigation system. Easy-to-assemble.
SHOP NOW
Non-toxic Wood Preservative for Raised Beds and Planters
Elevated garden beds, planters, garden decks and outdoor wood furniture can be protected against both water and fungal-borne decay with new mineral-based formulations which are non-toxic, and safe to use with food crops.
SHOP NOWTroubleshooting issues with raised garden beds
Why are the boards in my raised beds bowing or the corners working loose?
Soil can push outward over time, especially along long beds after heavy winter moisture. Before planting, check and tighten corners, add cross‑bracing or brackets. Reinforce long spans to keep the bed square and sturdy.
How can I stop invasive roots from entering my raised bed?
Fast‑growing weeds or nearby tree roots can creep into beds and steal nutrients and water. Pull roots back toward their source and consider digging out large roots or installing barriers to stop future encroachment. See our guide How to Block Tree Roots from Entering Your Garden.
What do I do if pests are eating my plants?
Natural methods like barriers (mesh or collars), beneficial insects, neem oil sprays or floating row covers can reduce damage from slugs, snails, aphids and other common pests while keeping harmful chemicals out of your garden.
My beds settle and the soil level drops each year — how do I fix that?
Some settling is natural, especially when using fresh organic matter. Simply mix and add more quality soil or compost in early spring to bring beds back up to level before planting.
Why is drainage poor and water pooling in my bed?
Heavy garden soil or a wet site can slow drainage in raised beds. Use a lighter raised bed soil mix, choose a well‑draining location and leave some space between the top of the soil and the bed edge.
Plants aren’t growing well — is it the soil?
Plants struggle in compacted, nutrient‑poor or poorly draining soil. Fill beds with a well‑amended soil mix high in organic matter and compost. Replenish nutrients each season for healthier, more productive plants.
Get started with raised bed growing
Raised garden beds make growing vegetables, herbs and flowers easy. With the right location, soil and care, anyone can enjoy the benefits of raised bed gardening all season long. To get started, explore Eartheasy’s selection of raised bed garden products.
 Responses (31)