
When my wife and I first started gardening in earnest, the results were discouraging. The seeds we planted would sprout and begin to grow, but soon the rate of growth would slow and produce undersize vegetables. Some would succumb to damage from insect pests and slugs, and even when we purchased healthy seedlings for transplanting, they failed to grow to the size we expected.
During our first few seasons of gardening we spent more time weeding than anything else. Our undersize plants left much of the topsoil exposed, and local weeds took advantage of the sunlight and available ground space. Although we watered the beds regularly and applied mulch to supress the weeds, the harvest from our early vegetable gardens was pitiful.
Over time we learned what most successful gardeners know: building soil is what gardening is all about. Once we turned our attention to the condition of the soil, our garden began to grow. Today we enjoy bountiful harvests from all our garden beds, and we spend almost no time weeding or dealing with insect pests.
With hopes of sparing you the mistakes we made, here are some tips for building productive soil for your garden beds and planters. And while there are some differences based on locale, these tips pretty much apply anywhere.

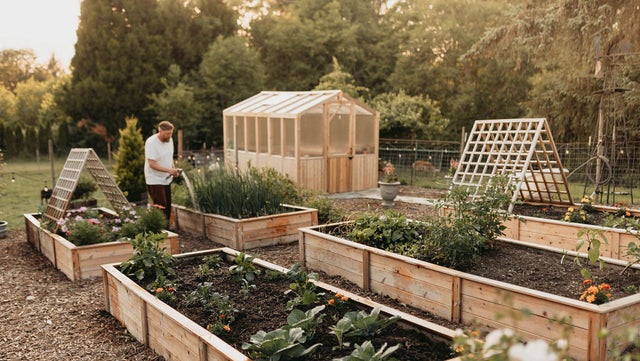
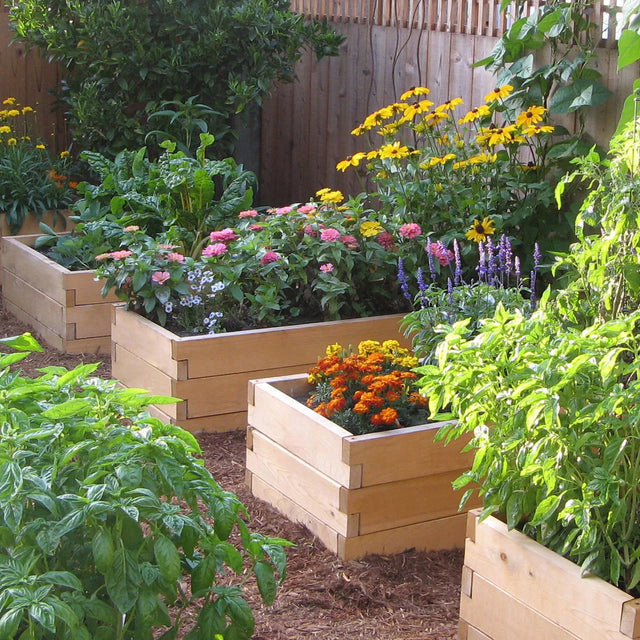
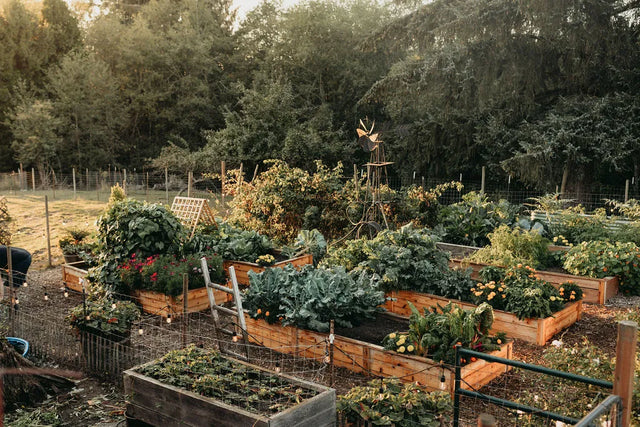
Natural Cedar Raised Garden Beds
1. Buying topsoil is no guarantee that it will contain organic matter.
What soil is best to use for raised beds? We purchased a half-dumptruck load of soil to develop a perennial bed for blueberries. The soil looked nice – dark brown, clean and well-screened. We transplanted small blueberry plants and expected them to take off, but the plants just stayed the same size. We became suspicious of the soil quality when weeds didn’t even appear. The soil, we learned, was ‘dirt’, a great growing medium but lacking organic matter which is key to growth. Therein lies the difference between garden soil and topsoil.
If you are buying soil for your garden beds or planters, ask the seller about the origin of the soil, and assume that you will need to ‘feed’ the soil to get it up to gardening standards.

2. Even the richest soil will need to be revitalized annually.
It is common that new gardens do well in the first year, even without additional soil inputs. This is because available organic matter, trace minerals and nutrients have been untapped. But after a season or two of gardening, these nutrients will have been taken up by the crops you have grown. You will need to revitalize your soil regularly. And don’t forget: the best fertilizer for vegetable gardens gets added before planting.

Composite Raised Garden Bed - 4' x 8'
But how to improve soil in raised beds? After one or two crops have been grown in our garden bedsbest soil for growing vegetables in raised beds, we plant a ‘green manure’ cover crop. These easy-to-grow crops benefit the soil in several ways. Once the green manure crop is mature, it is chopped up and dug lightly into the soil, and this replenishes the soil with fresh organic matter. Leguminous green manure crops also fix nitrogen which serves as a fertilizer for subsequent crops. The roots of the green manure also break up the soil and pull up deeper nutrients making them available for future crops. And the chopped up green manure also ‘fluffs up’ the soil which aerates the soil and improves drainage. After tilling in a green manure crop, we see the soil level in the garden beds raise several inches. The soil is loose and no longer compacted.

3. Soil should be light, crumbly and ‘fluffy’.
The best soil for growing vegetables in raised beds should be friable, porous and light. Roots need to travel through the soil to access available nutrients, which are essential to plant growth. If the soil is dense and compacted, much of the plant’s available energy is directed to the struggling roots. By lightening the soil, you will facilitate root growth and, as a result, vegetative growth.
Our simple test for soil density is to poke a finger into the soil. It should easily go down all the way to the third knuckle. If your soil fails this test, you will probably want to add some peat moss to your topsoil to lighten it. This is easy and inexpensive. In most cases you will then add lime, since peat is acidic. If you have purchased soil, ask the vendor if he knows the soil ph. This will let you know if more lime is needed. Most areas have acidic soil which needs lime, although some parts of the country have regions with alkaline soil. Vermiculite is also used by many gardeners to lighten the soil, and it doesn’t break down as quickly as peat moss. However, we don’t use vermiculite anymore, since our regimen of planting green manure has worked to keep the beds light and well aerated.

4. Compost is the best amendment you can give your soil.
Most gardeners keep a compost pile as a necessary complement to the garden. Compost for raised beds adds the organic nutrients that change ‘dirt’ into ‘soil’ for good gardening results. Since compost is such a valuable resource, we use it carefully. Rather than add compost after harvesting a crop, for example, we wait until a few weeks before planting the next crop to ensure that none of the compost nutrients are flushed through the soil during rainy spells.
Those unfamiliar with composting may think a compost pile is a smelly, unsightly mess. But this is not the case if the process is done correctly. An active compost pile hardly smells at all, and veteran gardeners enjoy the rich, earthy aroma of finished compost. For urban gardeners and people with small lots, sealed composters are available which contain any smells and have a tidy appearance. These sealed composters, also called compost tumblers, will also keep racoons, dogs, mice and any other interested critters away from the composting materials.
Another reason composters are a good complement to gardeners is that they provide a way of dealing with the dead plant matter after a crop is harvested. For example, once we finish harvesting the last of the tomatoes, the plant ‘skeletons’ are chopped up with a hoe and tossed into the compost. This way, even the plant residue from the garden is reused as it contributes to building compost for subsequent crops. However, if evidence of plant disease shows on the plant residue, we do not add this to the compost.

Deer Proof Cedar Complete Raised Garden Bed Kit - 8' x 8' x 20"
So, how much compost should you add to a raised garden bed? That will depend on the size of your bed and the quality of your soil. If you’re starting with a brand-new bed, you can mix compost with topsoil at a ratio of about 1 part compost to 2 parts soil. If you supplementing an established bed, top dress the surface or your vegetable row with 3 to 6 inches.
5. Choose an organic fertilizer.
Chemical-based fertilizers may be appealing as you read the product claims on the packaging, but the benefits are short-lived. Commercial fertilizers need to be reapplied with successive plantings. These fertilizers may give impressive results, but do not contribute to overall soil condition. And remember, gardening is all about the soil.
Organic fertilizers are also available, and we use these from time to time in garden beds where we may have a shortage of compost to add, or when we want to give young seedlings a quick boost. Our current favorite organic fertilizer is canola meal. Canola meal is a finely ground material which is lightweight and easy to spread. It is weed free (unlike some manures) and relatively inexpensive. However, mice are attracted to canola meal, so it needs to be lightly tilled into the soil, and it is important to store the bag well-sealed in a dry, safe place where mice can’t get to it.


Organic All Purpose Fertilizer - 3 lbs Granulated Fertilizer


The best soil for a vegetable garden in a raised bed requires a blend of organic matter, nutrients, and growing medium. Organic fertilizers can help support two of these three elements.
6. One last thing – rock phosphate.
You will likely get a year or two out of your basic soil, but soon you will need to add a source of phosphorus. Crops with adequate phosphorus show steady, vigorous growth and earlier maturity. This means larger fruits and vegetables in the fall. Earlier maturing crops are less susceptible to summer drought, disease infection and frost. In addition, rock phosphate is rich in minor elements such as boron, zinc, nickel and iodine which plants need in small amounts for optimum growth. Long term and slow-release feeding, rock phosphate becomes naturally available as the plant needs it.
Phosphate is essential for growth, and is commonly overlooked by gardeners. Buy a sack of rock phosphate and sprinkle some into your bed. The bag will last years, and it stores well. We add a little rock phosphate to our beds every two years.
By turning your attention to ‘what lies beneath’, the structure, drainage and organic matter in the soil, your garden will live up to your expectations and you will spend more time harvesting than weeding or dealing with plant pests and diseases. If you want to learn more about what to add to the soil for a vegetable garden, read The Best Organic Fertilizers to Double Your Harvest.
Happy Gardening!
 Responses (210)
About the Author
Greg Seaman
Originally from Long Island, NY, Greg Seaman founded Eartheasy in 2000 out of concern for the environment and a desire to help others live more sustainably. As Editor, Greg combines his upbringing in the cities of New York, Boston and San Francisco with the contrast of 31 years of living ‘off-grid’ to give us a balanced perspective on sustainable living. Greg spends his free time gardening, working on his home and building a wooden sailboat with hand tools.