
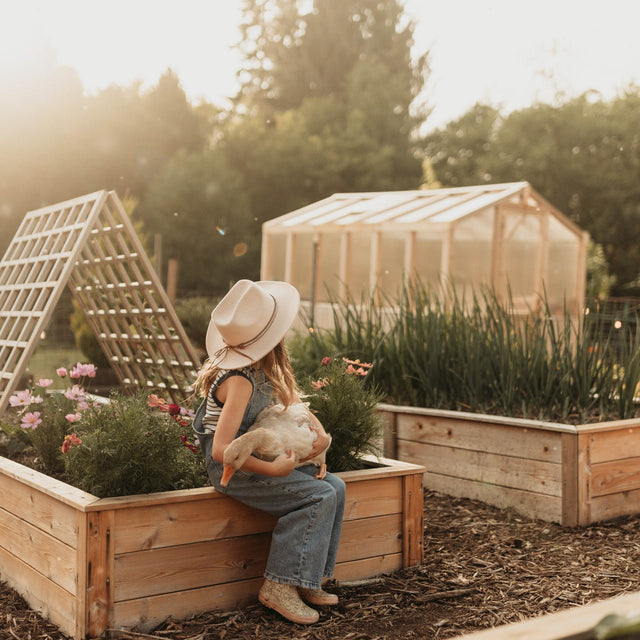
Working in the garden is also a shared experience for the family, and instills in children an understanding of the natural cycles of growth, which provide lessons of lifelong value.
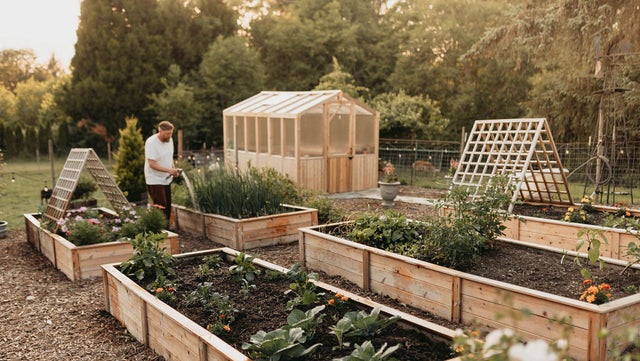
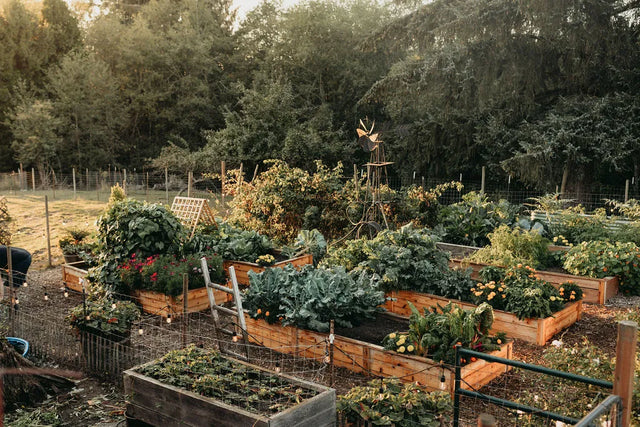
Our backyard food factory: This is how our family refers to our small backyard vegetable garden. In just 500 square feet (20′ x 25′), we enjoy a wealth of fresh vegetables up to eight months of the year.
Consider the benefits of growing your own vegetables at home:
- Lowers the cost of providing your family with healthy, organic vegetables
- Reduces the environmental impact of transporting and warehousing food
- Makes your meals more personal, tasty, and interesting
- Connects your family to the natural cycles of weather, growth, and renewal
- Cultivates mindfulness and provides healthy outdoor exercise
- Provides wholesome activity and lasting memories for your children

Garden layout: siting and size
Ideally, a backyard vegetable garden should contribute to your family’s well being without taking too much of your scarce free time. This can be achieved with a little planning to get started out right, and a commitment to low-maintenance organic methods, which save time and ensure a healthy garden year after year.
Whether you are growing a single bed for salad greens or a multiple bed “backyard food factory,” consider the following tips before you start digging.
Garden Size
The size you choose for your vegetable garden will be determined by the amount of available space and the amount of energy you wish to commit to the project. Even a 100 square foot garden, grown intensively, can produce a steady supply of salad greens for a family.
Our backyard garden is 20′ x 25′ (500 sq. ft.), and this is an ideal size which provides a variety of vegetables for a family of four, with enough extra to share with neighbors.
Orientation to sun and shade
The plants in your garden will want to face south, and will require a minimum of five hours of direct sunlight per day. Observe the path of shadows during the day from any trees, fences, tall objects, or adjacent buildings in your yard.
Sunlight calculators are available to give you a more precise measurement of sun exposure for choosing ideal planting locations. The area of maximum continuous light will likely be the best location for your garden.
Proximity to trees and root systems
Besides the shading effects of trees, consider the spread of their roots. Locate your garden plot at least 10′ beyond the drip line of any nearby trees. If you must grow close to any trees, you may need to dig a barrier around your garden to block root incursions.
This can be done by digging a narrow trench to hard clay, or at least deeper than existing roots. Set a sheet of galvanized metal roofing, or any inert heavy material that roots cannot penetrate, on edge. Then fill in the trench with the barrier material even with the soil level or slightly above.
Future trees
Planning on adding fruit trees in the future? If so, plan for them now by envisioning a 20′ root spread and the future shading effect of the tree.
Wind exposure
In windy areas, a fence or berm can serve as a wind barrier.
Slopes
If land is sloped, you will need to terrace the beds. The beds should be level or you will encounter problems with uneven water distribution and erosion. To terrace a bed, build up the low side with boards, flat rocks or wood slabs which are often available for free at sawmills.
Future crop rotations
Reserve space for an extra bed for next season’s use, where some of your plantings will be relocated. When not in use, this bed should be planted in a ‘green manure’ cover crop, which builds soil tilth and adds nutrients while keeping the bed free of weeds.
Irrigation
The design of your garden beds will also influence how you water your crops, so it’s important to think about irrigation when planning your garden. If you’d like to use automated watering, including drip irrigation and soaker hoses, ordering your beds in long, straight rows will save you time and money.
If you plan to use overhead sprinklers, larger, more centrally located beds with smaller paths may be a better option for you.

Garden bed and soil preparation
Any seasoned gardener knows that successful gardening is all about the soil. Once your beds are prepared and the soil is enriched and ready to plant, the bulk of your gardening work is finished. To ensure a healthy, productive garden, consider these basic tips.
How many beds to plant?
Unless you’re planning on planting one very long bed, you’ll need to establish several beds to fit the shape of your garden plot. It’s useful to grow in multiple beds because plants with similar requirements can be grown together, and then rotated to different beds in successive years. Rotating crops is key to retaining healthy crops year after year.
Leave adequate pathways
The pathways between beds should be just wide enough to allow your wheelbarrow to get in. In our garden, this is 21″. If space allows, a 24″ width is ideal. Be careful not to overdo your paths, since weeds can creep in.
How big to make the beds?
Vegetable beds can be any length, but keep the widths under 4′ for ease of weeding, mulching, and tending the plants in the middle of the bed. Longer beds are good choices for gardeners opting for drip irrigation.
How deep to make the beds?
The soil depth depends partly on the crops you want to grow. For raised beds, the height of the beds depends on your preference: taller beds require less bending over for the gardener. To learn more about the ideal depth for planting various crops, see our article Soil Depth Requirements for Raised Beds and Planters.
Raised beds vs. in-ground beds
Colder climates benefit from raised beds because the soil warms faster in spring, which lets you start planting sooner. In hot climates, in-ground beds require less watering than raised beds. Some pros and cons of bed types are listed below, or learn more about raised beds.
 In-ground garden beds
- Easiest way to get a bed established; nothing to build
- Cheaper than buying lumber for raised beds
- Pathway weeds can creep into the bed
- More likely that pets and children will walk on the beds
- You have to reach further down to tend the plants

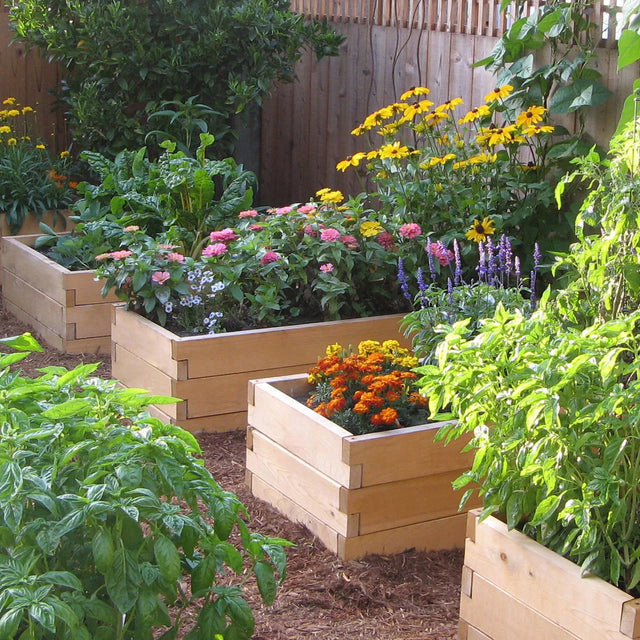
Raised garden beds
- Provide the best drainage and prevent soil compaction
- Soil warms up more quickly in the spring
- Prevent weeds from creeping into the bed
- Are easier to tend the plants because the soil level is raised
- Serve as a barrier to pests such as slugs and snails
For more information, including how to build, visit Raised Garden Beds.

'Sunken' raised garden beds
- By digging down, the pathway topsoil is added to the beds; this is a way to fill raised beds without importing soil.
- Same benefits as raised beds, but less drainage in wet months
- Less of a visual impact in the yard. While the beds are 12″ deep, the surface of the beds is only 4″ – 6″ above ground level
Prepare the soil
If the soil in your yard has never been gardened, chances are your vegetables will do well in the first year. This is because untapped nutrients and minerals are available. In subsequent years, however, the gardener’s adage applies: “you get out what you put in.” Taking the following steps will help you get the most from your new garden.
Determine soil pH: acid vs. alkaline
Soil test kits are available for this purpose, although we have never used them. Dandelions thrive at a pH level of about 7.5, and are a sign of alkaline soil, while the presence of moss indicates acidity. Acidic soils (low pH) can be sweetened by adding lime. Alkaline soils (high pH) need gardener’s sulfur and rich organic matter and should be mulched with acidic materials such as pine needles and forest duff. Alkaline soil is more common to arid regions.
“Double-dig” new garden plots
Dig down 12″ – 18″ for first time beds. Turn the soil and remove rocks and roots. Use a pitchfork instead of a shovel because the fork is easier to penetrate and turn hard soil and separate out the rocks. Also this minimizes harm to the valued earthworm population.
Check moisture level
Soil should be dry before planting. It shouldn’t clump or stick to your boots. Provide drainage if necessary by digging a shallow drainage trench alongside the bed, or grow in raised beds for improved drainage.
Develop the right soil texture
Garden soil should be well aerated to promote root growth and worm activity. The soil should be crumbly, not clumpy. Add peat or coir as needed.
Add organic matter
Once the soil is turned and any large clumps are broken up, you can enrich the soil with organic matter. This material should be dug, or hoed, into the top 6″ of soil where is will be available to the root systems of young plants. The best sources for organic matter are:
-
Compost: Compost adds nutrient-rich humus which fuels plant growth and restores vitality to depleted soil. The compost bin is an essential part of any backyard vegetable garden. In close residential neighborhoods, sealed compost units are best because they don’t smell or attract pests or flying insects.
There are two basic types of sealed composters: units that stand on the ground and have open bottoms; these usually sell for $50 – $400. Compost tumblers are fully sealed and off the ground, and they sell for $150 – $850. Compost tumblers also speed up the composting process.
To learn more about compost and composters, read our Composting Guide. To see our collection of composters for sale, visit our store for Composters and Composting Accessories.
- Animal manure: cow or horse manure are good sources of organic matter. Ideally, the manure should be well aged so it doesn’t burn any tender transplants. The liability of bringing manure into your garden is the weed seeds it may contain. This can be mitigated through the use of mulch, which covers the ground and blocks light from reaching any weed seeds.
- Green manure: these are fast growing plants from the legume family that can be easily chopped up and spaded into the soil, adding green organic matter that readily composts into humus. Green manure plants are commonly planted in fall and tilled into the soil in early spring. More information on green manure is on page three of this guide.
- Sea soil: Many garden centers carry ‘sea soil’ which is a combination of fish by-products and sawdust. Sea soil is rich but not too hot; it can be applied directly to beds.
Add any additional soil amendments
Your garden center will carry products such as bonemeal, bloodmeal, and a variety of amendments, which address specific soil needs. Glacial rock dust is particularly valuable as a soil amendment, especially after the first year of gardening has absorbed available minerals and nutrients.
Rock dust is organic, slow release, and loaded with essential nutrients that your plants need to be healthy throughout the growing season. It will encourage the root systems of trees, lawns, flower, and shrub beds, and of course, vegetable gardens. After a season of gardening you’ll have a better idea of any specific soil deficiencies you may want to address.
Level the soil and rake it smooth
This final touch only takes a few minutes but this enhances uniform water absorption from rain or the sprinkler and encourages more uniform sprouting.
Mulch the paths between beds
Wait until the bed preparation is complete before mulching the pathways. This is because any dirt clods that may fall onto the pathway will encourage weed growth. Scrape away any grass or surface weeds and cover the pathways with two layers of landscape cloth. Then cover with a 2″ layer of bark mulch. This will keep weeds from sprouting in the paths and migrating into the beds.
Avoid stepping on the finished beds
Once the soil is prepared for planting there should be no further need to step on the bed. Stepping on the beds will compress the soil and reduce aeration. If you need to stand on the bed, lay a plank across for walking on. This will spread the weight and minimize soil compaction.

Doing it right the first time
While it may seem like a lot of work to get the beds established for planting, this can be done in stages. You can start with a small plot and enlarge the garden as time and inspiration allow. Remember, the bulk of the work, establishing the beds, only has to be done once. Once in place, nutrients can be added by ‘top dressing’, and will not require heavy digging or strenuous work.
The best advice we can give is to put your attention to building rich, organic soil. It is amazing how plants which are bedded in rich soil will grow vigorously and have a natural resistance to insect pests and plant diseases. And as plants grow rapidly and their vegetative growth expands, soil-borne weeds become blocked out and less of a nuisance.
How to Build and Nourish Healthy Garden Soil
6 Tips for Building Soil in your Raised Garden Beds and Planters
Rich, organic soil is not something you buy in a bag, it is developed and nurtured year after year, using strategies such as crop rotation, green manures between crop rotations, and the occasional applications of peat to reduce compaction and rock phosphate to ensure adequate phosphorus.
Learning the basics of soil development is not difficult, it just requires some attention early in the season, before planting any crops, and during the season in between successive crop plantings. To learn more about about this important aspect of gardening, read our articles:
A well-planned and prepared garden will provide many years of productivity with relatively minimal routine maintenance.
Backyard vegetable garden series:
Getting Started
Garden Layout
Garden Bed and Soil Preparation
Growing Your Garden
What to Plant
Planting Basics
Enjoying the Bounty
Simple Maintenance
Harvesting and Storing
 Responses (31)