

Looking for a bean trellis for your raised bed? This is one of the best ways to trellis green beans that we've found, withstanding use year after year.
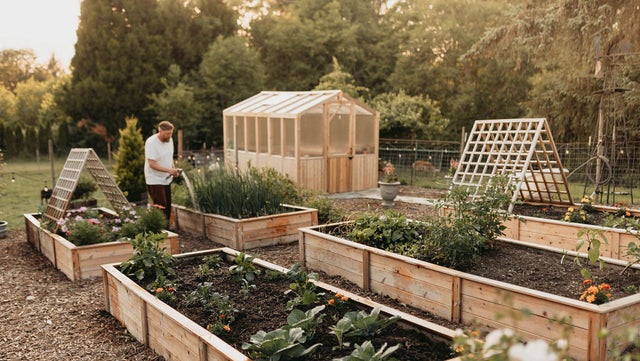
Raised garden beds offer gardeners a chance to get a head start on the season since the soil is warmer and better drained than ground-level beds. And while raised beds are built to specific sizes, their productivity can be greatly enhanced by adding a trellis.
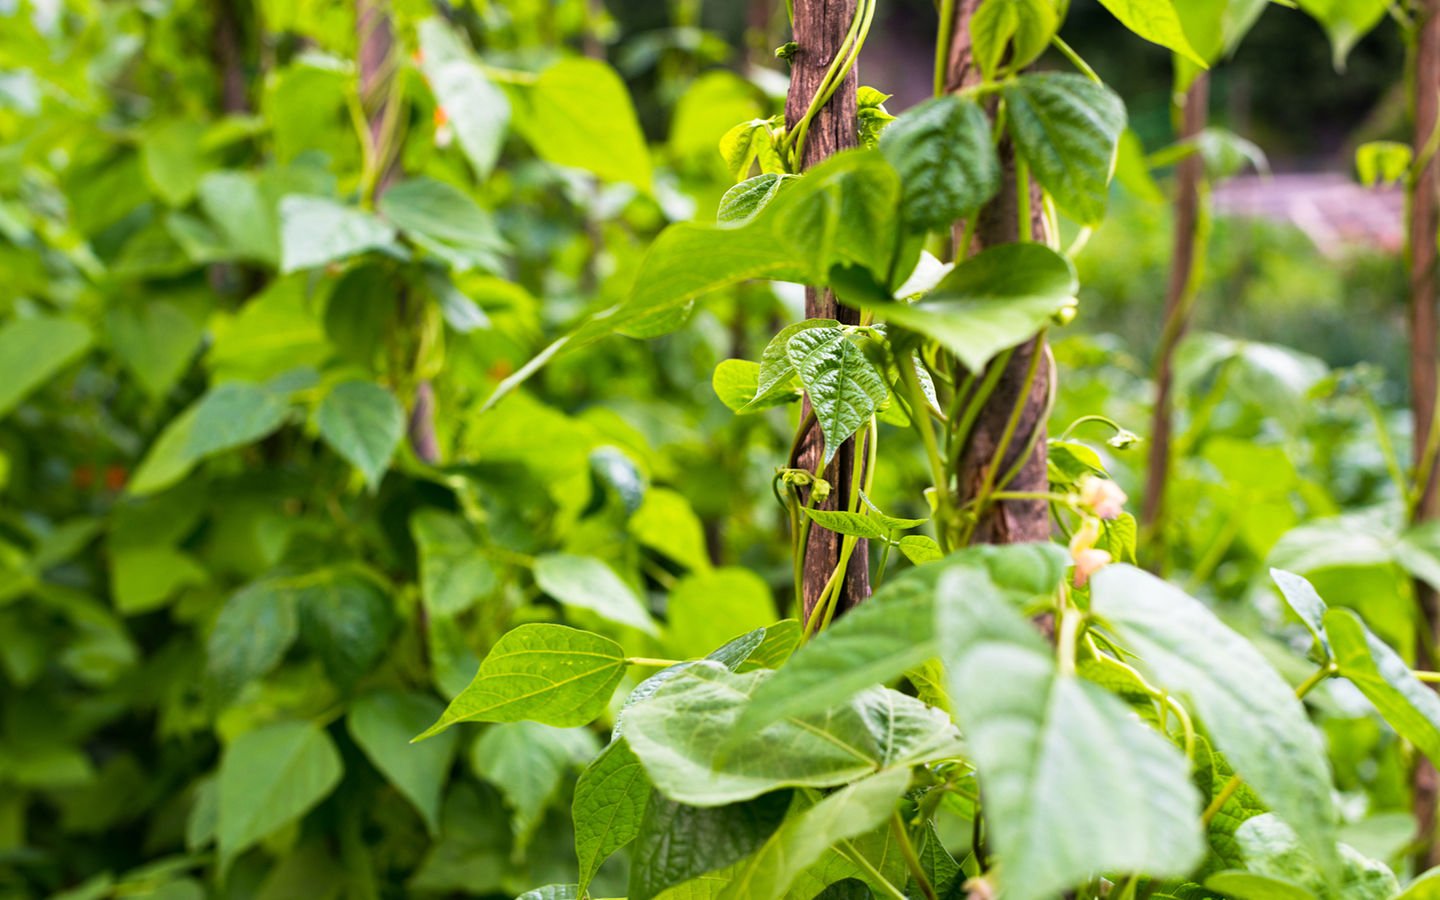
A raised garden bed with trellis lets vining crops spread and access more sunlight, producing a higher crop yield. A trellis also keeps vining crops out of your garden pathways, and provides a shading effect for the area behind the trellis.
We like this bed frame garden trellis because it’s inexpensive and very easy to build using a few basic hand tools. Our trellis is used for pole beans, but this design can be modified for other crops like peas, cucumbers and squash.
Advantages of this trellis design:
- This building method can be used to make a trellis of any width or height.
- Using strings instead of lattice, which is commonly used for trellises, makes it easier to harvest the beans. You can reach through the string to harvest from the back side of the trellis, instead of having to reach across from the front of the bed.
- The raised horizontal base provides a space beneath for hand-watering the plants.
- The trellis can be disassembled for winter storage or moved to a different bed.
- Installing the trellis does not make any visible holes or marks on the raised bed.
- It’s easy to replace any parts of the trellis which may degrade over time.
- Easy for a ‘non-carpenter’ to build.

Here is the finished trellis, before the strings have been added.

With the strings now installed, the young beans begin their upward climb.
Dimensions:
Frame Height – 6’. Extension pieces will be added to the frame for a total height of 8 – 9’.
Frame Width – 8’. The top horizontal piece extends 7” each side.
Top horizontal – 9’ 2” (110”). We used two 55” pieces butted end to end. The center gussets hold them together.
Materials:
Cedar 1” x 2”s: six 8’ lengths and two 5’ lengths
This trellis is made using rough cedar 1”x2”s. Rough (unplaned) cedar is ideal since its dimensions are a bit larger than finished 1 x 2s. If rough cedar is not available in your lumber store, then finished cedar will be sufficient. If you plan on oiling or painting the trellis, then finished cedar will be preferable.
Plywood for gussets: two pieces of 5/16” exterior plywood, each 14” square
We use exterior grade plywood for the small triangular gussets because plywood won’t split. The cross-lamination construction of plywood will hold the corners securely while keeping them square. If you garden in a damp region, the plywood will begin to degrade in a few years, however it’s easy to replace the gussets.
Extension pieces: 11 pieces of thin split cedar, each approximately 5’ long
These pieces raise the height of the trellis to over 8’, which pole beans will need. Use any thin cedar for this. We split pieces of lathe for this.
Sisal string
A biodegradable string, such as sisal, is ideal because at the end of the season you can just cut the strings (which will be covered in vines) and throw the whole mass of vines into the compost. It would be too much work to try to separate and reclaim the string.
Screws
Two sizes of screws are used for this construction. You will need 43 screws, 1.5” long (#8 gauge) for the gussets and the two supports. You’ll also need 14 screws, 2.5” long (#10 gauge). These longer screws are “coated deck screws”, commonly available at hardware stores.
Nails
The thin cedar extension pieces are attached using 1” galvanized box nails. These nails are thin so they don’t split the cedar. You’ll need 22 nails.
Assembly:
It’s easiest to build this trellis ‘in place’ than to build it elsewhere and then move to your garden. The four basic steps are: making the frame, attaching the two support braces, adding the extension pieces at top, and tying on the strings which the bean vines use to climb.
1. Cut the cedar 1 x 2’s.
Take three of the 8’ cedar 1 x 2’s and cut them each to 6’ (72”). These are the uprights.
Take two of the 8’ cedar 1 x 2’s and cut them to get four pieces, each 46 ½” in length. These are the middle and bottom horizontal pieces.
Take the two 6’ lengths and cut them each to 53 ½”. These are the top two horizontal pieces.
Cut the remaining 8’ length to two pieces, each 42”. These are the support braces.
2. Cut the gussets and screw them onto the bottom end of each upright.
Mark an “X” across the two 14” square plywood pieces and cut with a hand saw. These 8 triangular gussets are used to hold the frame together and secure it to the raised bed. Lay one of the 6’ cedar uprights on a bench, as pictured below, and orient the gusset so its base is 2” below the end of the cedar upright. Space screws as pictured. You can leave the upper gussets for now.

Each square yields 4 gussets. Cut two squares of plywood to get the 8 gussets needed.

Center on upright and screw in place, as shown, so the gusset is 2″ past the upright end.
3. Attach the three uprights to the raised bed.
Set the first upright in place on the edge of the raised bed and use 3 screws placed along the base edge of the gusset to attach it to the inside of the bed. Now use one of the 46 ½” pieces and set it on the edge of the bed to accurately space the second upright. Repeat for the third upright.

4. Assemble the rest of the frame and drill the holes for the string.
Use a pencil to make a small mark 7” up from the bottom of each upright. Align the first 46 ½” horizontal piece to the lines and screw it place, using two 2 ½” deck screws at each end. Repeat for the second 46 ½” piece. In the center, you will not be able to screw from the opposite side since the first piece is in the way. Use just one screw and carefully ‘toenail’ it in from the side at an angle.
Add the center horizontal pieces at a height 3’ up from the raised bed. Then add the top two pieces, butted end to end at center, resting on the top of the center upright. Screw in the gussets as shown to hold the pieces in place. Note the middle gussets are turned so their long edge runs horizontal, and two gussets are used (one on each side) at the top center of the trellis. Also note that the top horizontal pieces extend about 6” beyond the frame on each side.

At the center-top of the frame, a second gusset is added to the back side.
To drill the holes for the string, measure in 4” from each end of the three horizontals and space the holes centered on the board and 6” apart. You should have about 16 holes per horizontal. Use a ¼” drill bit.
5. Add the extension pieces.
Starting from the center, use the small box nails to attach each extension piece. Space them about 10” apart. One nail attached the piece to the middle horizontal, and another nail for where the extension meets the top horizontal.
6. Set two stakes into the bed and secure the two braces to the frame.
You will have a few 2’ lengths of cedar 1 x 2 left over. Take two of these and cut them 18” long and taper one end of each to fashion into stakes. Measure 18” out from the base of the trellis at each end and drive the two stakes, leaving about 6” protruding from the ground. Take the 42” lengths of cedar and screw one end into the stake and, using a level to set the trellis vertical, screw the other end into the side of the trellis. Now the trellis is stable.

After screwing brace to stake and upright, saw off the ends to flush both.
7. String ‘er up!
Run some string through the holes and tie off at top and bottom. Don’t use one string continuously through the whole trellis. At the end of the season, you can simply cut the strings and drag the whole mass of leaves and vines to the compost.

If you want, the trellis can be detached from the bed for winter storage or to be relocated. Just unscrew the 9 screws holding the gussets to the bed and detach the two braces. The frame is very lightweight.
This construction method can be applied to make a trellis of any length. We’re building a lower one now for a pea trellis. It’s a simple, inexpensive and satisfying project.
How to plant pole beans in a raised garden bed
To plant pole beans in your raised garden bed, ensure your seeding location receives full sun (at least 6-8 hours daily) and doesn’t fall in the shade of your trellis (see above). Prepare the soil by adding compost or organic matter. If you’ve never grown beans in your soil before, adding some Rhizobium inoculant can help increase yields.
Plant the seeds about 1 inch deep and 3-6 inches apart in rows, ensuring there’s adequate space for air circulation. Your trellis should already be in place, since pole beans grow quickly and definitely need something to climb. Water the bed consistently, keeping the soil moist but not waterlogged. In about 7-14 days, the seeds should start to germinate.
 Responses (23)
About the Author
Greg Seaman
Originally from Long Island, NY, Greg Seaman founded Eartheasy in 2000 out of concern for the environment and a desire to help others live more sustainably. As Editor, Greg combines his upbringing in the cities of New York, Boston and San Francisco with the contrast of 31 years of living ‘off-grid’ to give us a balanced perspective on sustainable living. Greg spends his free time gardening, working on his home and building a wooden sailboat with hand tools.