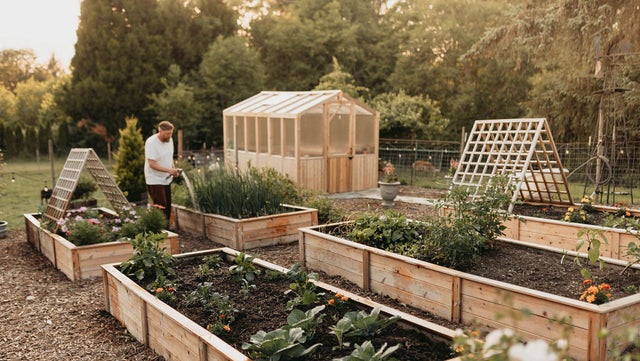

Get your beds ready now for rewards throughout the growing season.
This may sound odd to you, but my favorite season in the garden is early spring, after our raised beds are prepared but before anything is growing. The sight of the raised beds topped up with rich soil, moist and crumbly, free of weeds and ready to plant is a brief moment of perfection, full of promise, a blank canvas awaiting the gardener’s vision.
When raised beds are well prepared, the hardest part of gardening is also done. And the better the garden beds are prepared, the less work there will be during the growing season, and the more likely the gardener’s vision will come to fruition.
Here are some tips for preparing raised garden beds for a bountiful growing season.
Work from outside the beds.
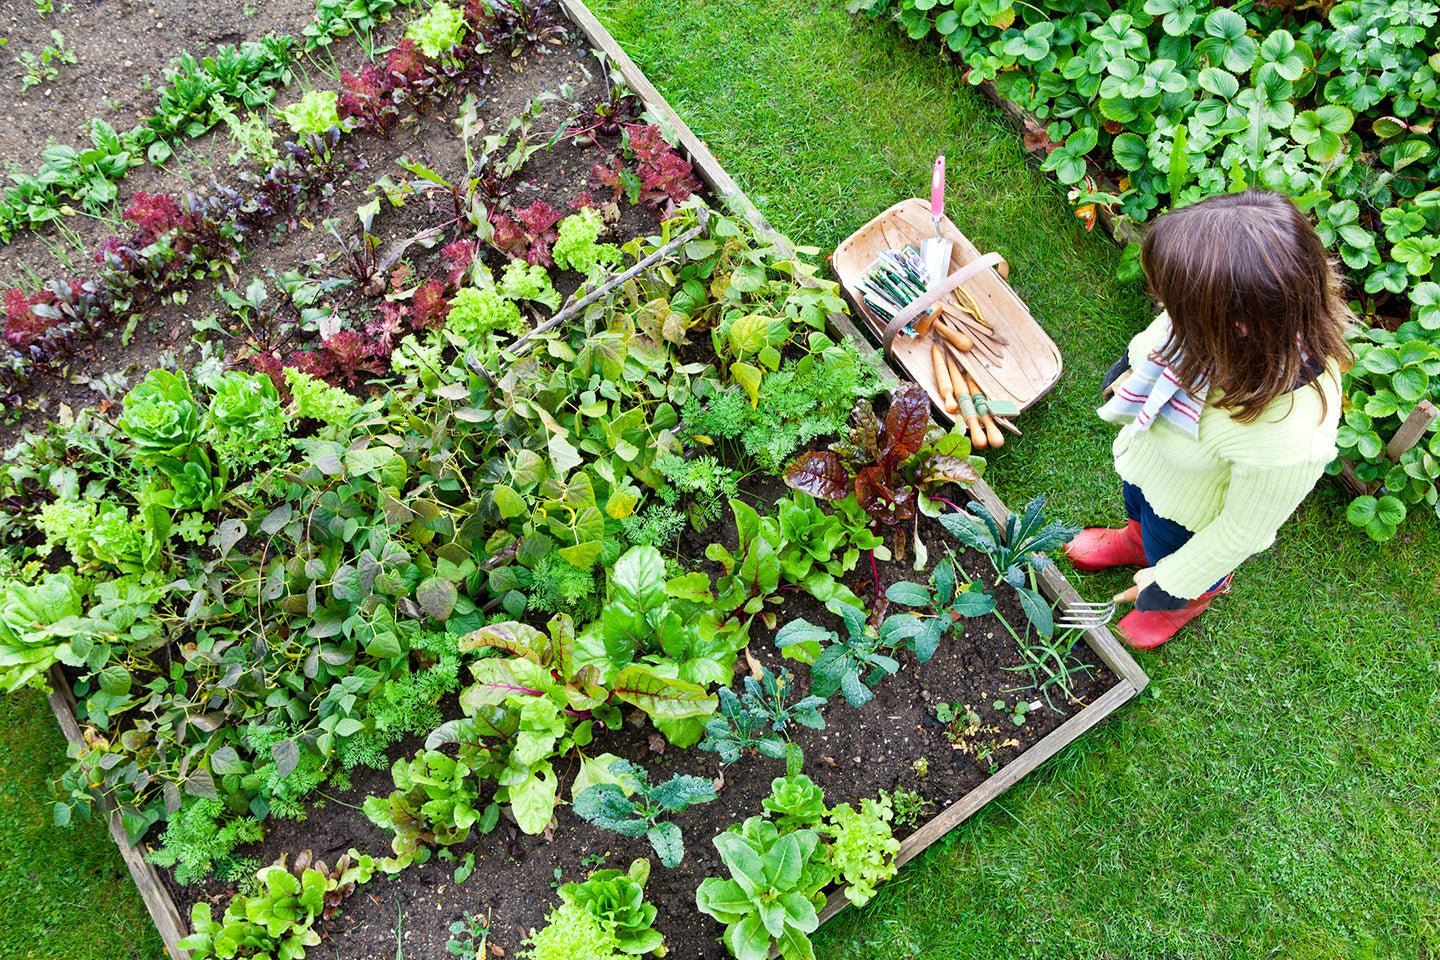
When gardening in raised beds, try to adhere to the one basic ‘ground’ rule: Don’t step on the soil within the raised beds. The biggest advantage of raised bed gardening is the light, fluffy, well-drained soil you’re able to develop which facilitates vigorous plant growth. Stepping on the bed will compact the soil, reducing aeration and slowing the activity of valuable microorganisms beneath the soil surface.
When considering how to prep raised beds for spring, be sure you’re able to reach every part of the bed without having to stand in it. (Our raised beds are 4’ across.) If you must stand on the raised bed, lay a long board across the bed and ‘walk the plank’ while tending the soil. If the ends of the board can be set on top of the sides of the raised bed, so much the better, as this will take some pressure off the soil.
Turn under, or smother, green manure cover crops.
‘Green manure’ cover crops are commonly planted between crop rotations, or over winter, to add organic materials back into the soil and provide a nitrogen-rich fertilizer. These cover crops should be turned under before they go to seed, and several weeks before the bed is replanted.
Turning under a cover crop can be done several ways. You can cut the crop close to soil level using a grass whip, a shears or weedeater. Save the cuttings for the compost or for use as mulch. The remaining stubble can then be chopped and turned under using a hoe. For gardeners growing in raised beds, however, using the hoe can be awkward near the sides of the bed because you don’t want to cut into the bed sides or push the sides outward by the digging action. This can be accomplished though with some care.
Some gardeners do not bother turning under the stubble because it’s less work and they don’t want to disturb the soil. Instead, they plant in between the stubble. The new seedling roots will break down the cover crop root clumps over time.
Another method for turning under cover crops, which puts no stress on the sides of the raised bed, is to ‘smother’ the cover crop by laying down a thick layer of mulch and covering the mulch with black plastic sheeting. This method has the advantage of breaking down the cover crop without having to cut it down or deal with the stubble, and the underlying soil remains undisturbed. This method, however, takes time. In sunny weather, which increases the heat beneath the sheeting, it may take 2 – 3 weeks to effectively smother the cover crop. In cool weather this will take longer.

Seaweed mulch is used to smother the cover crop. The bed on the right shows a ‘green manure’ cover crop before the mulch is applied.
Inspect each raised bed for needed repairs.
The soil in raised beds gets wet and heavy over the winter, and the added weight can exert pressure on the corners of the beds and can bow the center of long spans outward. Now is the time to fix anything that needs attention, before you start sowing seeds or transplanting seedlings, since any repair will disturb the soil.
Raised beds which have corners screwed or nailed together can sometimes have a corner work loose. If this happens, you’ll usually need to dig back a few inches of the soil to be able to get the corners together. For fixing the corners on cedar beds, we have used coated deck screws for repairs, with good results.
Most raised beds which are sold commercially have corner constructions which won’t work loose. The manufacturers use designs such as mortise-tenon, half-lap with through pin, interlocking hardware, or winged brackets to ensure the corners hold together.
If the sides of your raised beds are bowing outwards in the center of long spans, this can be corrected in two ways. You can set a stake on the inside of the bed and screw the bowed side into the stake. This may last a season or two. A better method is to pull the bowed side in and attach it to the opposing side of the bed. Use ½” aluminum flat stock and drill a hole in each end for screws. Attach this bar to the top edge of the lower boards (if the bed is two boards high), or bend the stock to a 90 degree angle and screw it to the inside of the boards. Manufactured raised beds usually are designed with cross-supports or center pins so bowing does not occur.

Aluminum ‘flat-stock’ is used to prevent bowing of long spans. These will be covered by soil so they won’t be visible.
For raised beds made from untreated wood, you can apply a non-toxic wood treatment to protect against sun exposure, water and fungal decay. A single application will last a lifetime, saving time and money required to maintain and replace wooden boards.

Eco Wood Treatment
Pull or block any invasive roots.
Look for evidence of any fast-growing creeping roots from weeds such as horsetail, and pull them out toward the direction from which they came. In some cases, we’ve had to dig a hole in the pathway to pull the root under the side of a raised bed. Track the root to its source if possible and pull the whole root ball.
Tree roots are attracted to moist, fertile soil. If you have trees near your raised bed, you might want to dig into the soil of the bed to see if there is any encroachment of tree roots into the fertile raised bed. In our garden, we had roots travel over 50’ from a tall fir tree and grow directly under our prime garden beds. It was a big job to dig up the bed and remove the roots, and then install a barrier. You may be able to identify potential invasive roots before they grow into your beds. Is there a fruit tree nearby, a large tree a little further away, or large shrubs close by? Anticipate future growth and contain it before any problems arise.
Some gardeners will advise laying carpet or some similar ‘blanket’ barrier on the bottom of your bed as a barrier to invasive roots. I think this is a mistake because it slows drainage and limits root growth for some vegetables. Instead of blanketing the bottom of your raised bed, you can block invasive roots from the outside of the bed. A narrow trench can be dug on the side of the raised bed which lies in the path of invasive roots. We dug the narrowest trench we could, which was about 8” wide, and dug down to clay. The depth varied from 3’ – 4’. Then we slipped down, on edge, large sheets of HDPE recycled plastic which we got for free from a feed store. (These sheets were used under feed bags on pallets.) Corplast sheeting is another option. Some gardeners use sheets of metal roofing for this purpose, but this will rust over time. Once the trench is filled back in, trim off any excess at soil level. This will now serve as a permanent root barrier for your beds.

Sheets of HDPE plastic are set into the ground to block roots from a nearby tree. The edge which sticks up above ground will be trimmed to ground level.
Appraise the soil for amendments and top up the beds.
The soil in raised beds is constantly settling. In early spring, the soil level may be several inches lower than it was last fall. Take a spadeful of soil and see if it’s light, moist and crumbly. If the soil seems compacted, some peat may be needed to fluff it up.
If you are using the no-till method of gardening, amendments can be applied by top-dressing. Amendments such as lime, peat, rock phosphate and compost can be spread onto the soil and covered with a thin layer of mulch. Once the plants are up, more mulch can be applied which will top up the bed.
When considering how to prepare a raised bed for planting vegetables, soils with a pH below 6.2 will benefit from the addition of lime. 6.5 – 6.8pH is ideal. Dolomite is the finest grind, and is recommended. With ground limestone it will take twice as long for plants to derive any benefit from it. Ideally, lime should be added several weeks before planting. Hydrate lime, or “quick lime”, is not recommended, as it can change the soil pH so rapidly that plants may be damaged. Cover newly limed beds with plastic during heavy spring rains to prevent runoff. Soil pH can be determined by using a soil pH test kit. The exception to this rule is when you’re preparing soil to plant potatoes, which dislike too much lime.
Once the base garden soil is in place, it’s time to feed it. The preferred method is to till in compost. Compost can be purchased from a nursery in bags, but a preferable way is for the gardener to keep a homemade compost pile. Different models of composters are available to suit garden size and residential restrictions. ‘Compost tumblers’ are sealed composters which speed the composting process and deter pests. If you are interested in compost tumblers, read our comparison of different types of compost tumblers.


Manure is best applied about two weeks before seeding in the spring.
Set stakes or poles and trellises for tall crops.
If you plan to grow tomatoes, peas, pole beans or other plants which will need support, now is the time to set these supports in place. If you wait until your plants are in, driving the stakes into the soil may disturb the young spreading roots of your vegetables.
For tomatoes, we recommend building a simple structure overhead and cover it with 6 mil clear plastic sheeting, or corrugated clear fiberglass panels. The purpose of this is to keep the rain off the tomato leaves, which will prevent tomato blight. During the growing season you will need to hand water your tomatoes, or use a soaker hose, taking care to avoid wetting the foliage. Once the tomatoes are established, adding a generous layer of mulch will reduce the amount of watering needed, and will also protect the plants during dry spells.

Premium Drinking Water Safe Garden Hose - Standard 5/8"
In our garden, we screw the upright supports for the tomato shelter directly into the inside face of the raised bed. This is simple to put together, and easy to disassemble in winter when we want the beds exposed to winter rains. Leaving the shelter on through the winter results in the soil being over-dry, which drives away the worms and other beneficial organisms which need some moisture in the soil.

A simple structure with plastic sheeting will keep the rain off the tomato foliage. This is key to preventing tomato blight.
Cover the soil with mulch or plastic sheeting.
Covering the soil in your raised bed is a good practice throughout the year. It is especially useful in the early spring, after amendments and fertilizer have been added. The cover helps retain warmth which helps the amendments break down and ‘cure’ before seeds are planted or starters transplanted. The cover also serves to shed water so your valuable amendments aren’t washed away in heavy spring rains. The cover also discourages the sprouting of weed seeds which may lie dormant in the garden soil.

Corn Gluten Granulated Organic Fertilizer 9-0-0 - 30 lbs
In colder, wetter climates, covering the bed with a layer of black poly sheeting will be more effective than mulch at helping warm up the soil in early spring. We usually wait until the weather warms up before putting down a thick layer of mulch.
Divide perennials. Clear and mulch perennial beds.
Existing perennial beds can be cleared of old plant debris and mulched to prevent weed growth. Perennials are easiest to divide when emerging shoots are only 2 to 4 inches tall. Early perennials like asparagus should have last years’ stalks cut at ground level and put in the compost. Prepare new beds for perennial flowers by spreading a 6-inch deep layer of organic matter (i.e. peat moss, compost, rotted manure) and work in deeply. Plants growing in deep, rich soil are less likely to suffer from summer drought. Mulch should be applied around, but not over the sprouting root mass of each plant.

Last years’ stalks are cut down in perennial asparagus beds, and mulch is kept low to enable new shoots to emerge without obstructions.
Wait till the soil is warm before planting.
Avoid the temptation of planting your garden at the first sign of a warm spell. If you work the soil when it’s too wet, you’ll risk losing all of its natural air pockets and your seeds will suffocate and rot. As a general rule, wait until the soil is 60 degrees F (15 degrees C) before sowing seeds. 68 – 80 degrees F (20 – 30degreesC) is optimum for germination. Even early spring ‘cool weather’ crops like peas will do best when the soil is about 75 degrees F. When a handful of soil feels and looks more like crumbly chocolate cake than either an ice cube or mud pie, its likely ready for spring planting.
It may sound like a lot of work getting your raised beds ready for spring, but routine garden maintenance throughout the year makes the early spring chores manageable. Most gardeners are eager to get outdoors in the spring, and these preparations are a labor of love. And the rewards will last all summer as your garden vision unfolds. When considering how to prepare a raised garden bed for planting vegetables, remember the above tips for your best chance of success.
 Responses (144)
About the Author
Greg Seaman
Originally from Long Island, NY, Greg Seaman founded Eartheasy in 2000 out of concern for the environment and a desire to help others live more sustainably. As Editor, Greg combines his upbringing in the cities of New York, Boston and San Francisco with the contrast of 31 years of living ‘off-grid’ to give us a balanced perspective on sustainable living. Greg spends his free time gardening, working on his home and building a wooden sailboat with hand tools.